 Articles
Different Resolutions to QuickBooks Payroll Error 12002
by Sprink Davis Accounting and BookkeepingSlow internet connectivity and network timeout can lead to different types of technical errors in QuickBooks Desktop. One prominent error is QuickBooks Error Code 12002. There are many factors which can provoke this error. But in this blog we shall elaborate all the troubleshooting solutions to fix QuickBooks Error code 12002.

Major
causes of QuickBooks Error 12002
This error can be caused by:
•
Wrongly set SSL settings.
•
Firewall or Antivirus may be
disrupting the connection to the network.
•
Internet Explorer is not set as
the default web browser.
•
Poor internet connection.
Ways to troubleshoot QuickBooks Error 12002
Way 1: Making alterations to Internet settings
Step 1: Open the Run command box from Start
menu.
Step 2: Type in INETCPL.CPL in Run and then press Enter.
Step 3: Choose Medium-High protection.
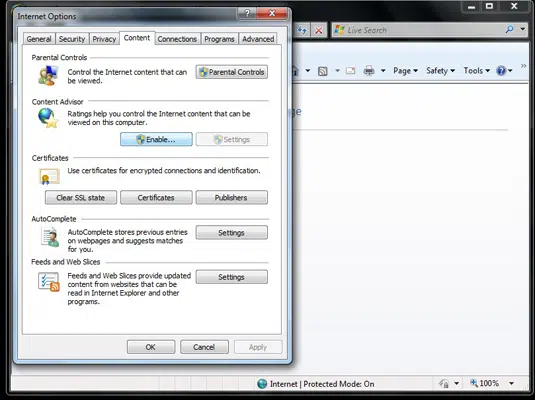
Step 4: Now, move to Internet option. Then
click on Security.
Step 5: Go for Connections tab, and here
click on LAN settings.
Step 6: Now, click on automatically detect
settings.
Step 7: Remove the check box besides “Use a proxy server from your LAN”.
Step 8: Incorporate the correct I.P and
Port. Then hit on Ok.
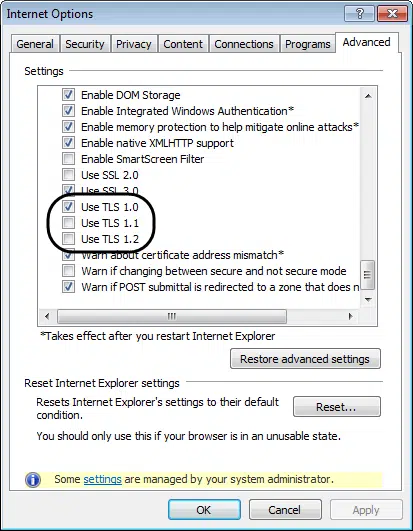
Step 9: Click on Advanced tab.
Step 10: Move on to Security, then click on
Use TLS 1.2.
Step 11: Hit on Ok.
Way
2: Internet Explorer should be made the default browser
Step 1: Go to Run Window and then type in INETCPL.CPL.
Step 2: Go for Programs. Set Internet
Explorer as the default browser.
Way
3: Update QuickBooks Desktop
Step 1: Launch QuickBooks. Head for Help tab.
Step 2: Click on Update QuickBooks Desktop.

Step 3: Tap on Update Now.
Step 4: Hit on Get Updates.
Step 5: Click on Reset Updates. When the update finishes, run QuickBooks install desktop the updates.
Way
4: Discard QuickBooks in the Firewall
Step 1: Go for the Start menu.
Step 2: Type in Firewall.
Step 3: From here, open Windows Firewall.
Step 3: Go for Advanced Settings, then right-click
"Inbound Rules".
Step 4: Click on New Rule.
Step 5: Now, click on Port and then tap on
TCP. Then hit on Next.
Step 6: Use the Q.B. port. For eg. for QB 2019, the ports are: “8019,
56728, 55378-55382, 56276, 55368-55372, and 55378-55382.”
Step 7: Go for the Allow Connection option.
Then hit on Next.
Step 8: Select each profile and then name
the new rule.
Step 9: Hit on next and press Enter.
Step 10: The same steps need to be
implemented for outbound rules as well.
Way
5: Clean install QuickBooks Desktop
Clean install of QuickBooks entails the following steps:
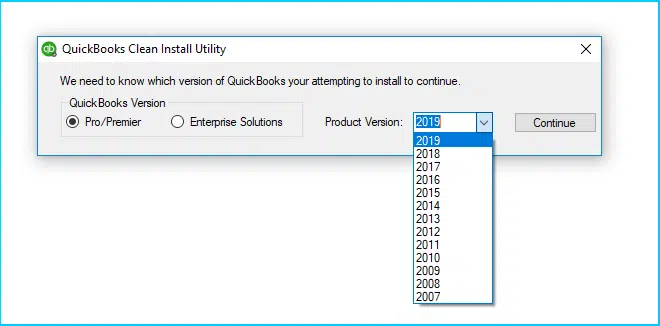
Step 1: Go to Control Panel.
Step 2: Now, go for Programs and Features.
Here, choose QuickBooks.
Step 3: Click on Uninstall. Once done,
rename QB folder.
Step 4: Next go for a fresh installation of
QuickBooks Desktop.
Step 5: In the end, launch QuickBooks as admin. This should do away with QuickBooks Error code 12002
This article provided an overview of all the troubleshooting ways for fixing QuickBooks Error 12002. If you need any technical help, just give our QuickBooks payroll experts a call at 1-800-615-2347.
You may like also: How to Repair QuickBooks Install Error 1712?
Sponsor Ads
Created on Nov 21st 2023 01:21. Viewed 91 times.

