 Articles
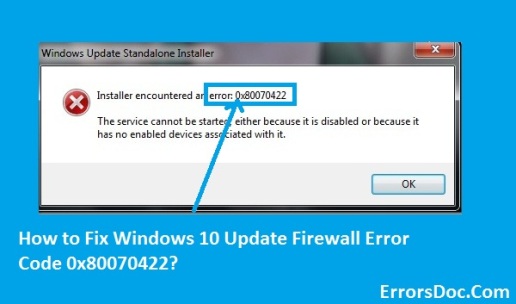
How to Fix Windows 10 Update Error Code 0x80070422?
by Nishant Gujjar SEO ExecutiveWindows is popular for providing frequent updates. Windows Updates always play a significant role in any Windows 10 computers. Apart from providing new features and amazing performance it offers the best ways of easily getting the security features for all the Windows computers.
Source: Windows 10
Sometimes, while updating the Windows computer system users might experience various error code related to Windows 10 updates which completely depends on the issues related to your system. The error code 0x80070422 is one from all of the Windows Update Errors; it is an ordinary error which is frequently experienced by many users.
Nevertheless, this error code 0x80070422 is similar as some other Windows update errors, usually occurs while users are trying to update the Windows 10 PC and prevent users from upgrading their Windows 10 computer system. Therefore, the 0x80070422 error indicates that all the updates were futile to download and creating any issue in the installation process with the error on the Windows 10 screen:
“There were troubles in installing the updates, but we’ll try again later. Error Code: 0x80070422”
So, without wasting time, let’s start discussing how to fix the Windows 10 Update Error Code 0x80070422. To avert unnecessary error, follow the steps in the proper series. The steps are discussed below.
Steps to Fix Windows 10 Update Error Code 0x80070422
There are multiple methods for fixing this Windows 10 Update error code 0x80070422. Here we provide you with few effective methods which help you in troubleshooting it. Here how to fix it:
Method-1: Restart All Windows Update Service
- Simultaneously hit the Window + R keys to launch the run search box.
- Inside the run dialogue box, type in ‘services.msc’ and hit Enter key.
- Search for the Windows Update Service by pressing the W keys on the keyboard.
- After that, right-press the ‘Windows Update’ option and navigate to the ‘Properties’ tab.
- Now, locate the Start up type to the ‘Automatic’.
- Then, make sure that you have located the ‘Service status’ as on the ‘Running’ mode.
- Check the below-given services are locate to running mode:
- DCOM Server Process Launcher.
- Network Connections.
- BitLocker Drive Encryption Service.
- Windows Firewall.
If the aforementioned services not located to running mode, right-click on each of them and choose the Start tab.
Method-2: Turn off Network List Service
- Open the run dialogue box by simultaneously clicking on the Windows + R keys.
- In the run dialogue box, type in ‘services.msc’ and hit Enter key.
- Next, look for the ‘Network List Service.
- After that, right-press the Network List Service option and select ‘Properties’ tab.
- From the drop-down list, select ‘Disabled’ option.
- Then, press the ‘Stop’ tab.
- Hit the OK tab followed by Apply button.
- Lastly, restart your computer system and again update the Windows 10 computer system.
Charlie Noah is a Microsoft Office expert and has been working in the technical industry since 2002. As a technical expert, He has written technical blogs, manuals, white papers, and reviews for many websites such as office.com/setup.
Sponsor Ads
Created on Feb 8th 2019 09:26. Viewed 561 times.

