Sublimation on DTF Film Made Simple for Home Printing in 2025
I get asked all the time, “How do I do sublimation on dtf film at home in 2025?” The answer is simple now. I use KoalaPaper Sublimation DTF Film with my regular printer and ink. I don’t need special equipment or expensive upgrades. This new film lets me print vibrant designs on cotton, blends, and canvas right from home. The market for home sublimation printing keeps growing fast, and it’s easy to join in with affordable tools like this.
Key Takeaways
- Use KoalaPaper Sublimation DTF Film with a normal sublimation printer and ink. This makes home printing easy and cheap. You do not need special tools.
- Print your design backwards on the film’s matte side. Put a thin layer of hot melt adhesive powder on it. Cure and press at 320°F for the best results.
- Pick cotton, cotton blends, or canvas fabrics for bright prints. These prints will last a long time. Change heat and pressure for soft or stretchy fabrics.
- Follow easy care tips like washing inside out in cold water. Do not use bleach. This keeps your prints bright and strong.
- Stop common problems by checking the film’s direction. Use good supplies. Cure the powder the right way. Peel the film after it cools down.
What You Need for Sublimation on DTF Film
Essential Supplies
When I started with sublimation on dtf film, I wanted to keep things simple. Here’s what I always have on hand:
- KoalaPaper Sublimation DTF Film: This film works perfectly with my regular sublimation printer and ink. I don’t need to buy a new printer or special ink, which saves me money and hassle.
- Hot Melt Adhesive Powder: This powder is a must. It helps the design stick to the fabric and makes the print last longer. I sprinkle it over my printed design before curing.
- Heat Press: I use a heat press to transfer my design from the film to my shirt or bag. It gives even heat and pressure, which is important for a good transfer.
If you’re curious about other brands, here’s a quick comparison:
Printer and Ink Choices
I love that I don’t need a fancy printer for sublimation on dtf film. Here’s what I use and recommend:
- I use a standard sublimation printer, like an Epson EcoTank or a converted six-color inkjet printer.
- I load it with regular sublimation ink. No need for DTF-specific ink.
- I make sure to load the film print side up, so my design prints correctly.
- I always print my design in mirror mode.
- I keep my printer clean and check ink levels often to avoid problems.
Tip: Sublimation printers can’t print white ink, so I stick to light or white fabrics for the best results.
Optional Tools
Some extra tools make my prints look even better and save me time:
- Curing oven: It melts the adhesive powder evenly, which helps my designs stick better.
- Teflon or parchment sheets: I use these during pressing to protect my prints and keep the heat even.
- Automatic powder shaker: This tool spreads the powder smoothly, which is handy if I’m making lots of shirts.
- RIP software (like Acrorip or Cadlink): It helps me get the colors just right and lines up my designs perfectly.
- A heat press with digital controls: I can set the exact temperature and time, so every print comes out great.
With these supplies and tools, I can do sublimation on dtf film at home without stress. It’s easy, affordable, and fun!
How to Use Sublimation on DTF Film
Design and Print
I always start by creating my design in a program like Photoshop or Illustrator. I make sure my image is high resolution and uses RGB color mode for bright, accurate colors. Here’s a quick look at the best file formats and software for this step:
I always save my design at 300 DPI and make sure the size matches my project. Before printing, I mirror the image. This step is super important because the design will flip when I press it onto the fabric.
Here’s how I print:
- I load KoalaPaper Sublimation DTF Film into my sublimation printer, print side up.
- I use regular sublimation ink—no need for special DTF ink.
- I print my mirrored design onto the film. The double-layer coating on KoalaPaper film keeps my colors crisp and stops ghosting or dye migration.
Tip: Always double-check that your image is mirrored before printing. This saves you from wasting film and ink!
Apply Adhesive Powder
Once my design is printed, I move quickly to the next step while the ink is still wet:
- I sprinkle a thin, even layer of hot melt adhesive powder over the printed area.
- I gently shake the film to cover all the ink, then tap off any extra powder. Only the inked parts should hold the powder.
- I make sure not to use too much powder. A thin layer works best for clean, strong transfers.
Note: Using high-quality adhesive powder made for sublimation on dtf film helps my prints last longer and look brighter.
Cure and Press
Now it’s time to cure the powder and transfer the design:
- I preheat my heat press to 320°F (160°C).
- I cure the powder by hovering the heat press over the film (without touching) for about 60–90 seconds. Sometimes, I use a curing oven if I have a lot of prints.
- I pre-press my shirt or fabric for a few seconds to remove moisture and wrinkles.
- I place the cured film, design side down, on the fabric. I cover it with a Teflon or parchment sheet.
- I press at 320°F (160°C) for 15–20 seconds with medium pressure.
The double-layer coating on KoalaPaper film really shines here. It keeps my design sharp and stops colors from bleeding into the fabric.
Tip: Always follow the recommended heat and time settings. Too much heat can cause ink to bleed, while too little might not transfer the design fully.
Peel and Finish
After pressing, I let the fabric cool for a few seconds. Here’s how I finish the process:
- For most projects, I wait until the film is cool to the touch (cold peel). This gives the best adhesion and durability.
- I slowly peel the film away from the fabric. The design stays on the shirt, looking bright and smooth.
- Sometimes, I do a quick second press with a Teflon sheet for 5 seconds. This locks in the design and makes it even more durable.
Note: If you want a softer or glossier finish, try peeling the film while it’s still warm (hot peel). For most of my shirts, I stick with cold peel for the strongest results.
That’s it! With these steps, I get professional-looking results with sublimation on dtf film right at home. The process is simple, and the results are always impressive.
Best Fabrics and Results
Cotton and Blends
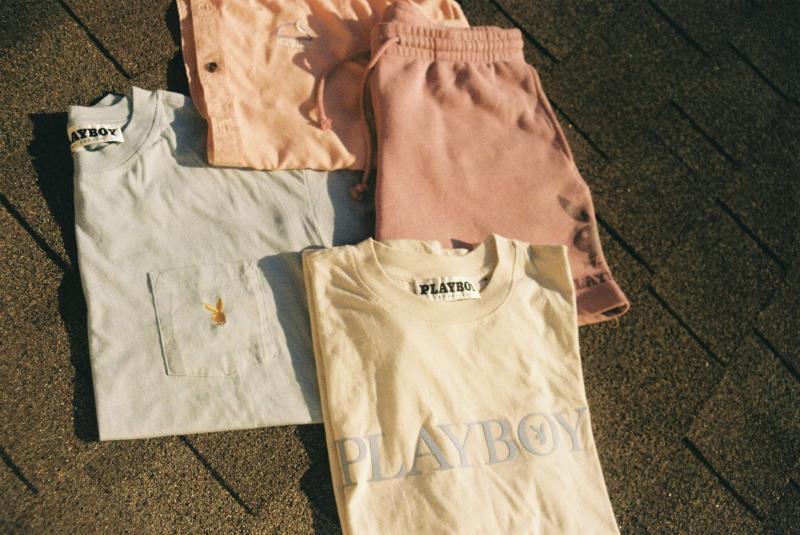
I love printing on cotton. Cotton gives me bright, bold colors and a soft feel. My T-shirts and tote bags always look sharp and last a long time. Cotton-polyester blends also work great. They balance softness and strength, so my prints stay vibrant even after many washes. I use these blends for casual wear and uniforms. Here’s a quick look at how different fabrics perform:
If I use lightweight fabrics, I lower the heat and pressure to keep them from shrinking or warping. For stretchy fabrics like spandex, I take extra care with heat so the print does not crack.
Canvas and More
Canvas is another favorite of mine. It holds color well and feels sturdy. I use it for bags, aprons, and even wall art. Polyester and nylon also work, especially for sportswear and outdoor gear. Nylon dries fast and resists water, which is perfect for swimwear and jackets. When I print on dark fabrics, I always pretreat them. This keeps the colors from bleeding and fading.
Care Tips
To keep my prints looking fresh, I follow a few simple steps:
- I turn my shirts inside out before washing.
- I use cold water and a gentle cycle.
- I pick mild detergent and skip bleach.
- I air dry or use low heat in the dryer.
- I never iron directly on the print. If I need to iron, I use a cloth on top.
- I avoid fabric softeners because they can weaken the print.
Tip: I always store my printed items in a cool, dry place away from sunlight. This helps prevent fading and keeps them looking new.
Troubleshooting Sublimation on DTF Film
Print Quality Issues
When I first tried sublimation on dtf film, I ran into a few print problems. Sometimes my transfers looked faded or blurry. Other times, I saw ghosting or color changes. Here are the most common issues I’ve faced:
- Faded colors from printing on the wrong side of the film.
- Ghosting when the film shifts during pressing.
- Ink bleeding if I skip the protective sheet.
- Blurring or fading from using the wrong heat, time, or pressure.
- Uneven colors caused by moisture in the fabric or film.
To fix these, I always double-check the film orientation before printing. I use color correction software for bright, accurate colors. I secure my film with thermal tape so it doesn’t move. I pre-press my fabric to remove moisture. I follow the recommended heat press settings for time and temperature. These steps help me get crisp, vibrant prints every time.
Tip: KoalaPaper’s double-layer anti-bleed coating keeps my colors sharp and prevents ghosting or dye migration.
Adhesion and Peeling
Adhesion problems can be frustrating. Sometimes the design peels off or doesn’t stick well. I’ve learned that several things can cause this:
- Overheating breaks down the adhesive.
- Under-curing the powder weakens the bond.
- Peeling the film too soon or too late affects adhesion.
- Uneven powder application leads to rough edges.
- Moisture or dirt on the fabric blocks bonding.
- Using low-quality film or ink reduces stickiness.
I always pre-press my fabric to remove moisture and smooth the surface. I apply adhesive powder evenly and cure it at the right temperature. I let the film cool before peeling for the best results. Regular maintenance of my printer and heat press helps too. KoalaPaper’s special coating makes peeling easy and clean, so my designs stay put.
Durability and Fading
I want my prints to last. Durability and fading issues usually come from poor heat press settings, low-quality inks, or harsh washing. Here’s a quick table showing what affects print life:
To keep my prints looking new, I wash garments inside out with cold water and mild detergent. I avoid bleach and fabric softeners. I air dry or use low heat. I let prints cool before the first wash. These habits help my sublimation on dtf film projects stay bright and strong.
Printing at home has never felt this easy. I can make bright, soft designs on cotton, canvas, and more with just a few simple steps. My prints look sharp, last long, and feel just like the fabric—no extra texture. I love how fast the process is, and I can use so many colors. If you want to try something new, grab KoalaPaper Sublimation DTF Film and join the fun! Share your creations, download free designs, or join a group to swap tips and ideas. ??
FAQ
How do I know which side of the KoalaPaper Sublimation DTF Film to print on?
I always check for the slightly matte side. That’s the print side. If I’m not sure, I scratch a corner gently. The print side feels a bit rougher.
Can I use my regular sublimation printer and ink?
Yes! I use my standard sublimation printer and regular sublimation ink. I don’t need to buy any special DTF printer or ink. That’s what makes this process so easy at home.
What fabrics work best with this film?
I get the best results on cotton, cotton blends, and canvas. My prints look bright and last long. I also use it on polyester and nylon for sportswear.
How do I stop my design from peeling after washing?
I always cure the adhesive powder well and let the film cool before peeling. I wash my shirts inside out with cold water. This keeps my designs looking fresh.
Do I need special software to make my designs?
Nope! I use programs like Photoshop, Canva, or even free online tools. I just make sure to mirror my image before printing. Simple designs work great.
Post Your Ad Here
Comments