 Articles
How to Import and Export QuickBooks Data with MS Excel Files?
by Levin Smith Microsoft Certified TechnicianAre you looking for the process to import or export the MS excel files in QuickBooks? One can easily import and export various lists and transaction types to and from QuickBooks desktop using different file formats. The user can also import customers, vendors, items, and charts of accounts from an excel spreadsheet. Using some basic steps, one can easily import or export the MS excel files in QuickBooks. To learn those steps, make sure to read the post till the end.
Steps to import and export excel files to QuickBooks
The steps discussed below can help you successfully import and export the files in QuickBooks. Let us have a look:
Standard import
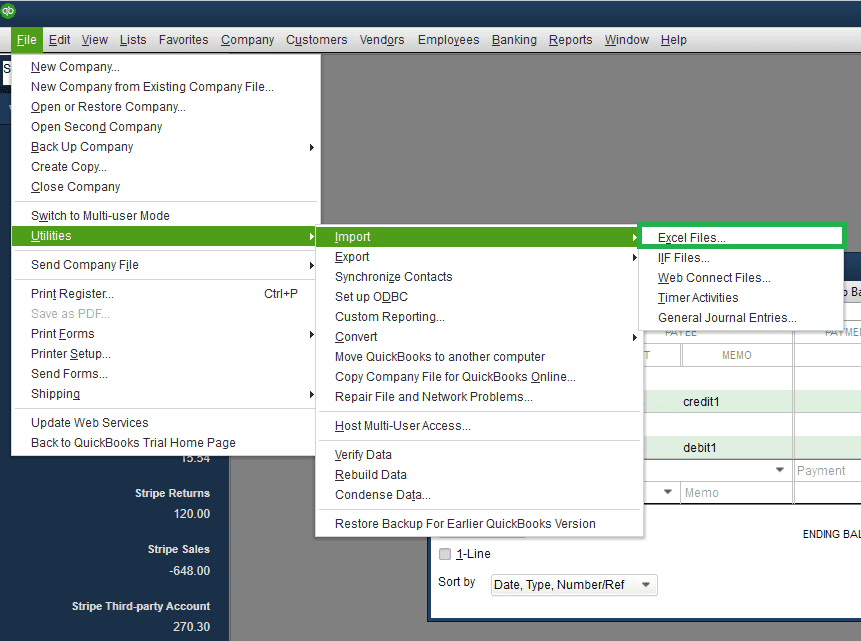
It should be noted that the QuickBooks software opens a formatted excel spreadsheet where one can enter the information. And when the user saves and closes the file, he/she can review results and data. The steps involved in standard import are as follows:
• The user needs to first head to the file menu
• After that choose utilities then import and then excel files.
 • If the user gets the add/edit multiple list entries window, then it is suggested to click on no.
• Once done with that, follow the wizard in importing files.
• Now, select the type of data.
• Also, the QuickBooks will then open a formatted excel spreadsheet.
• Once the user has entered the information, saved the file, and closed it, he/she will get the option to add my data now.
• The user now has to review results and view data in QuickBooks.
• Lastly, select close when done.
In case you need to import additional customer, vendor, or item data from excel using this option, it is suggested to go back to the window.
Steps to import charts of accounts in QuickBooks
Before performing the steps to import, make sure to backup the data.
• At first, head to the lists menu and then choose charts of accounts.
• Go for the account drop down and then select import from excel.
• Click on browse to select the file you wish to import.
• Also, select the file
• Hit open.
• Go for the excel sheet where the data you wish to import is on.
• Also, map the accounts.
• This step tells QuickBooks how to import the data from the excel sheet. The column headings in QuickBooks might be different from the excel, so you would have to match them
• Enter in a mapping name
• Go for the account as import type.
• And tally the information under QuickBooks with the column headings in the excel sheet.
• After that hit the save tab
• Now, choose import. Hit yes to confirm the process
You may also visit: How to Resolve QuickBooks Error 15106?
Now that we come to the end of this post, it is believed that the information shared in above might have helped in import and export the data files in QuickBooks successfully. However, if you are stuck at some point or if you need our assistance, then contact our QuickBooks technical support team at +1-888-351-0999 is recommended. We are a team of certified QuickBooks professionals who work round the clock in providing instant support services
Sponsor Ads
Created on Dec 1st 2022 06:00. Viewed 203 times.

