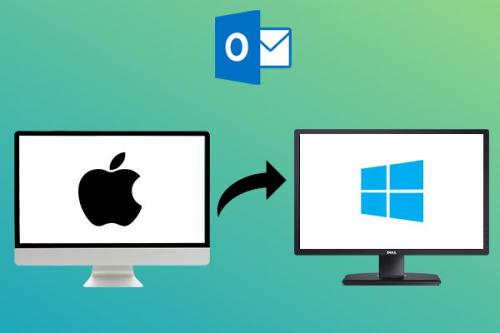
Switching from Mac OS to Windows! How to move your Outlook database (convert OLM to PST)?

Summary: Microsoft Outlook is one of the
most used email clients by many organizations and it is available for both most
famous OS in the world Mac & Windows. But Outlook uses two different types
of data files to store data on both platforms. OLM is Outlook data file in Mac
OS, while in Windows PST file is Outlook data file. As we can’t open .olm file
in Outlook for Windows. So here, we describe how to move Outlook mailboxes data
from Mac to Windows PC by converting OLM to PST file.
Microsoft Office introduces a Mac-specific Outlook data file
called OLM with Office 2011. OLM file works same for Outlook in Mac as PST file
works in Windows Outlook to store all mailboxes items including Inbox, Outbox,
Sent Items, Contacts, Calendar, Notes, etc. Since the OLM file only works with
Outlook for Mac computers and in Windows you can’t access data in Outlook
directly from OLM file. Thus, if any user switching from Mac to PC and wants to
migrate all of his Outlook databases to Windows OS, then you have to export all
data from OLM file to a PST file and then import the resultant PST file in
Outlook for Windows.
How to
Convert OLM to PST?
Manual
Method:
To
convert OLM file into PST format manually, you have to locate the OLM file in
your Mac Computer. You can find the OLM file in either of these two default
locations:
Documents\Microsoft
User Data\Office 2011 Identities\Main Identity\Databases
Or
Documents\Microsoft
User Data\ MS Office 2011 Identities\Main Identity\Data-Records\Message
But before directly
navigating to one of these folders to find the OLM file, first, you will have
to create it by exporting all mailboxes data in an OLM format file.
STEPS:
1.
In any of the folder location mentioned above, click
on File > Export to open a new Export Window.
2.
Select all items available in this folder.
3.
Here a new option appears “Delete items after exporting”. Check “Do
not want to delete item” option.
4.
Next “Save As” option will appear. Here chooses
a destination folder to save the OLM file.
5.
Click on Save to save the OLM file.
Once you created the
.olm file, then you need to convert it into PST format using methods mentioned
down below-
Note:
In this method, you have to use the IMAP server as
an intermediate device between different Outlooks for Mac OS and Windows to
receive remote files.
Step 1: Create a Gmail account or any other IMAP email account.
(or you can continue
to step 2 you have already an email account)
Step 2: Configure your IMAP account in Outlook on your Mac:
1.
Open Outlook app on your Mac computer and select Tools
> Accounts.
2.
Now type your E-mail address, Password, Username,
and other details.
3.
Type “imap.gmail.com” as Incoming Server
and “smtp.gmail.com” as Outgoing Server.
4.
Check Use SSL to connect in both options.
5. Enter 465 in Outgoing port number and click Add
Account.
on
a.
Select all the items and folders in you Mac Outlook
you want to move
b.
Right-click on the selected folder and click Move>
Copy to folder.
c.
Select a destination folder of your IMAP account and
choose copy.
d.
After upload process completed all your mailboxes
are now in an IMAP account.
(you
can refresh your Gmail account to check all data)
Step 4: Configure the same Gmail/IMAP account in Outlook for Windows.
a.
Open Account Settings in Outlook. File > Info
> Account Settings> New.
(another option – In
Control Panel Select Mail>Email Accounts> New)
b.
Check Manually setup or additional server typed and
click Next
c.
Choose POP/IMAP as your account type.
d.
Enter your User Information Name and E-mail.
e.
Select account type IMAP and fill your Server
Information, user name, and password.
f.
In More Settings choose “my Outgoing
server requires authentication” in the Outgoing Server tab.
g.
In Advanced Tab type 993 as Incoming
Server and select type of encrypted connection as SSL.
h.
Type 465 as Outgoing Server and click
OK.
i.
Now click on Next and test connection click Finish.
Step 5: Migrate your IMAP/Gmail account mailbox data to Windows Outlook
a.
Open your Gmail account in your browser and go to Settings.
b.
Go to the “Forwarding and POP/IMAP” menu.
c.
Under “IMAP Access” option check Enable
IMAP.
d.
Enable Auto-Exchange on and Archive the
message option if you want.
e.
Click on Save Changes.
f.
Now in Outlook in Windows click on “Send/Receive
message”.
By performing all
the steps above you will be able to access your emails, contacts and other data
from Mac Outlook in Windows.
Recommended Method for OLM to PST Conversion:
Above mentioned
manual steps will help you in accessing your Outlook mailboxes from Mac to
Windows but these steps are very complicated and may be confusing for a
non-technical person. These manual methods are also risky as any small wrong
step may cause of your all-important data loss.
For a safe and easy
conversion of OLM to PST, I recommend you to try vMail
OLM to PST Converter Software. This OLM
converter software is very advance as it directly converts OLM file from Mac
Outlook to PST file for Outlook in Window with every Outlook components like
Inbox, Outbox, Sent, contacts, calendar, tasks, notes, etc. There is no risk of
any data loss during this conversion process. This tool also provides you
options to convert OLM file to other formats like MSG, MBOX, EML, HTML, PDF,
RTF, vCard, etc and you and can also directly export to Office 365 or Exchange
server.
Post Your Ad Here
Comments