 Articles
How to fix iPhone 6S Cannot Boot?
by Nancy N. DIY diagnostic and car repair toolsApple fans, at least once or another, will have to face the annoying problem of not powering the iphone after normal use. Or you may be facing this problem even when you are reading this article. If you are, lucky you! Because you are in the right place to get a solution for how to fix your iphone after normal use does not boot.
It's not difficult to deal with the issue if iPhone cannot boot after normal use, firstly observe if the appearance is broken or deformed. Open the iPhone screen to check if there are the traces of water corrosion, battery resistance is normal, then power on and test with multimeter ( 2A am multimeter is recommended ) directly up voltage to 1.8A, it belongs to the symtom of high current.
Tear down all the accessories and starting with a single iPhone 6S motherboard, the result is the same, so you can be sure that the accessories or parts are ok. Before we fixed a lot of large current cell phone devices, power on and directly measure value, making sound is basically the components on VCC main power supply get problem, but the situation of current up to 1.8A is still relatively rare. After determining the measurement, we can confirm the problem is from VCC circuit, for big current device, you can use rosin with electric solder iron, apply rosin on the solder iron and work on VCC main circuit components, it will produce white smoke, power on again, you can see Q2300 charging switch tube quickly shine. The part is shown in picture 10-1-1.
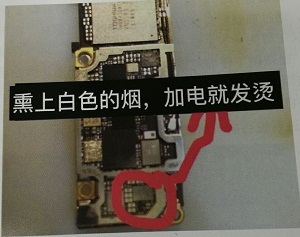
This will make people think that the booting problem is caused by this parts, according to our experience, it's not caused here.
Two circuit power supply is shown in picture 10-1-2.
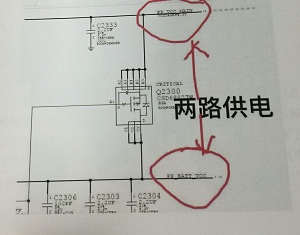
Because this component focuses on B+ and VCC power supply, so it's heating firstly, but it can be determined that it's not bad, for 6S 1.8V device, you can directly focus the problem on backlight part. As shown in picture 10-1-3, the backlight part is easy to burn out.

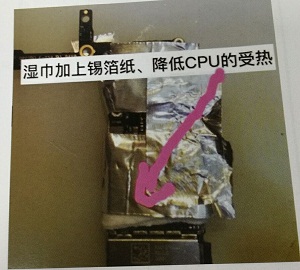
Open the iPhone CPU shield (setting spiral hot air gun 260 degrees can easily take off, avoid high temperature, so as to avoid CPU solder explosion), we find the traces of components are burn out on the two backlight diode and C4023, it is best to pack first before processing elements near the CPU. As shown in picture 10-1-4.
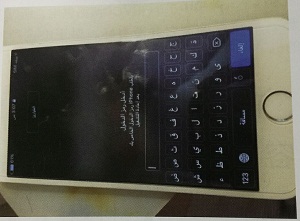
Disassemble two diode and a capacitor and power on again is normal, deal with the solder pad with low temperature solder. you should be gentle when handling it since the pad is easy to fall off. Replacing the new components, reboot and test, every function is normal now. As shown in picture 10-1-5.
Note: If the diode is installed in the reverse will appear large current phenomenon, after the replacement, you can test again by solder iron with rosin so that will be more intuitive to see whether it is installed, C4023 capacitor must be installed, otherwise it is easy to burn the iPhone backlight IC.
This iPhone 6S problem is solved after replacing two diodes and capacitor C4023. Some of the backlight IC and backlight inductance get yellow, which will be required to be replaced. 6S backlight parts are easy to be broken, and the components are all covered with glue. When you remove it, don't be impatient. It will be convenient for the following work after the glue is removed.
Sponsor Ads
Created on Nov 28th 2017 07:55. Viewed 333 times.

