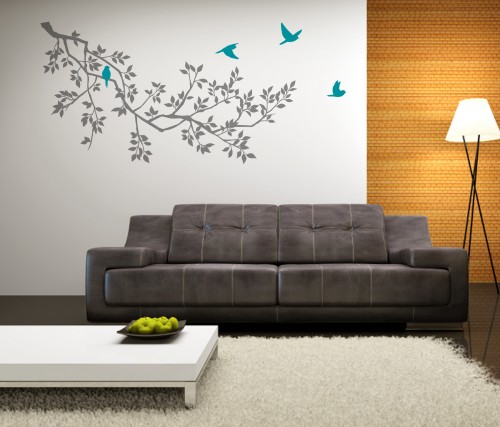
How Do I Put Up Wall Stickers?
I’ve put up dozens of wall stickers and I thought it might
be an idea to do a ‘how to’ article listing the things I’ve found are a great
help but aren’t always in the instructions. The main over-riding thing to
remember at every stage when you put them up is to take your time, it’s easy to
get carried away when the first bit goes up easily and this can lead to
stretches and tears.
·
Preparation. First of all, is the surface suitable? Wall
stickers will stick on painted plastered walls, glass, metal, ceramic, stone
(if it’s smooth) polished concrete and on top of untextured wallpaper.
Basically, if it’s a smooth surface a wall sticker will stick. One thing they
don’t always tell you is that the paint on a painted plastered wall needs to be
at least a fortnight old otherwise when you’ve had enough of the sticker and
peel it off it will take the paint with it. Now to check the wall; is it free
from dust? Is it free from grease? Is it free from those little knobbly bits
that I always seem to get with an emulsion roller? Pick ‘em off with your
thumbnail.
·
The
Sticker. Remove it from its
packaging, look at it, compare it to the picture on the website or the
instructions that came with it. Do you know which bit goes where? Does it make
sense? Will it fit? Wall stickers are easily trimmed down to size with a craft
knife or scissors but will it look weird if you cut half that tree trunk off?
Once you’ve got a handle on all the bits then divide the sheet into its
component parts. Cut close to the sticker and you’ll have less backing and
transfer sheet flapping around when you come to stick it. If the sticker is
just one big design then this is the point at which you trim off the excess
backing. Again, go close to the sticker and it’ll be easier to stick.
·
Sticking.
The sticker comes between two sheets: the transfer sheet which you can see
through and the backing sheet which you can’t. Peel about three or four inches
of the backing sheet away from the back of the sticker at its top and fold it
over flat, with a crease. Stick the sticker gently where you want it and walk
across the room. Turn around. Is it straight? Is it where you want it? If it’s no you can move it because you
haven’t squashed it down too hard. Once you’re happy it’s right (A helper can
pull it taut if it’s not clear if it’s straight) then you can stick for real. This
is the part where you need to be extra vigilant.
·
Backing
Sheet. Slowly pull the backing sheet
downwards from underneath the sicker while at the same time smoothing out the
sticker onto the wall using a straight edge. A credit card or old store card is
ideal for this. It’s important to take this part slowly as it’s easy for some
parts of the design to stay on the backing sheet and slide out of view causing
stretches and tears. If you see a part not want to come off then encourage it
with a craft knife or your trusty thumbnail. Once the backing sheet is off
completely, go over the sticker with your straight edge and squash it down
firmly.
·
Transfer
Sheet. Now it’s time to take off the
transfer sheet. Peel off a corner at the top, fold it over flat and start to
pull it down. Keep the transfer sheet flat against the wall as you pull it and
when you have enough transfer sheet folded over put both your hands on the
sticky side and keep sliding slowly down. If you get any bits of the sticker
lifting at this stage, smooth them out with a clean dry cloth. If extremeties
lift completely and flop back loose remember to stick them back from where they
are stuck out to the tip and so avoid rucks. If you get any air bubbles right
in the middle, pop them with a pin.
·
Multi-element
stickers. If you get a big sticker
in several bits (a tree trunk perhaps) don’t try and get them to abut, It’s
impossible to get exactly right. Arrange them so they overlap by a couple of
millimetres and if there’s a step in the design as a result then trim it with a
sharp craft knife.
And that’s it! Once you’ve finished go over the whole thing with your clean dry cloth and squash down any bits you’ve missed. Your wall sticker will last at least five years outside and indefinitely inside!
www.zazous.co.ukZazous are online retailers of wall stickers, wallpaper
murals, furniture, lighting, contemporary vinyl flooring, tableware and
accessories for the modern home. Fashion-forward, highly individual designs
that create striking interiors.
Post Your Ad Here
Comments