How to Build a Custom Acrylic Frame for Your Unique Artwork
In addition to acting as a protective barrier and improving the general aesthetic experience, framing is crucial for improving the visual appeal of artwork. Acrylic frames are often used due to their clarity, robustness, and portability; they add an up-to-date touch while letting the artwork take centre stage. This article aims to steer readers through the steps of making a customized acrylic frame while ensuring it satisfies both practical and ornamental requirements. High-quality acrylic sheets of a range of thicknesses and finishes are chosen, the artwork is precisely measured, the acrylic is moved to size, the frame is put together using glue or corner brackets, and a backing material is added for stability. Using particular colours and designs that go well with the artwork is different to personalize it.
Materials Needed
High-quality acrylic sheets from reliable vendors, corner brackets for stability, the proper adhesive, and protective film are required to construct an acrylic frame. It's advised to use UV-resistant acrylic sheets to keep the artwork from deteriorating over time. For stability, corner brackets are necessary, and glue works well with acrylic. These resources guarantee a project's success.
Measuring Your Artwork
For artwork to suit perfectly during a frame and improve presentation, precise proportions are essential. Measure the artwork's height and breadth with a measuring tape or ruler after placing it on a level surface. Take great note of those measurements, ensuring they're taken from the surface. To form a comfortable border and shield the borders of the artwork, add an inch of formatting. To make sure crisp lines for cutting, draw dimensions on the acrylic employing a pointed pencil. You'll make a well-fitting acrylic frame that preserves the integrity of your artwork while showcasing it nicely by following these instructions.
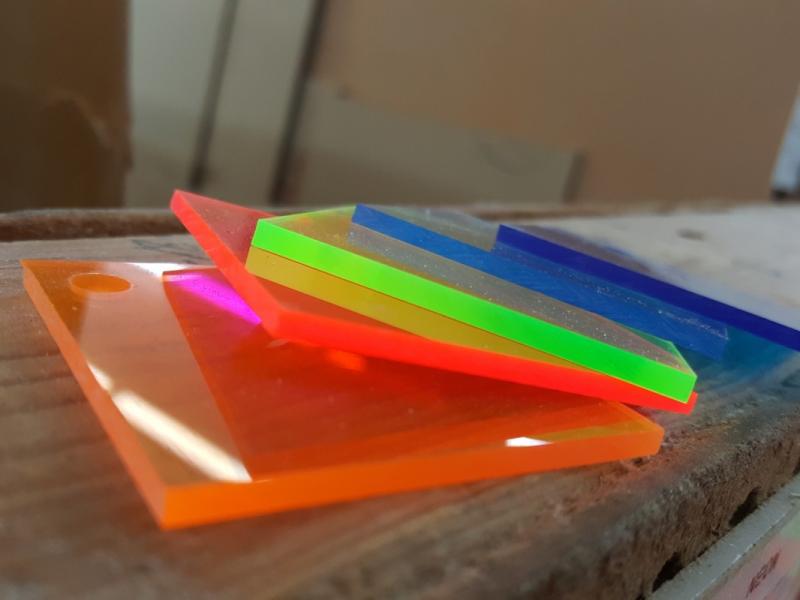
Cutting the Acrylic Sheets
To securely and successfully cut acrylic sheets, draw the specified cut line with a fine-tipped marker, then use a straightedge to guide the cutting tool—such as a jigsaw or utility knife. Score the sheet along the indicated line for thinner sheets, then snap the sheet. To avoid getting hurt by sharp objects or debris, put on gloves and protective glasses. Because of its adaptability, UV protection, and resistance to shattering, acrylic glass is a popular choice for framing and is ideal for preserving treasured memories and artwork. Consider taking the expert advice and guidance from acrylic glass cut to size. They come up with the proper support and services as per your needs and preferences.
Assembling the Frame
Use a methodical process to place together a frame out of cut acrylic parts. Properly align the sides of the pieces as you arrange them within the appropriate configuration. For stability, use L-brackets or corner brackets. Mechanical fasteners or adhesives are used to supply a smooth disassembly or appearance. Taking into consideration the load of the acrylic and, therefore, the planned usage of the frame, select the technique that works best for your project.
Adding Artwork to the Frame
Double-sided tape or acid-free mounting corners are safe, non-damaging ways to carry artwork during a frame. To prevent the artwork from moving, confirm it's supported and centred. For layered artwork or many parts, use spacers to feature depth and separation, improving the piece's aesthetic appeal and shielding it from possible harm.
Finishing Touches
By adding ornamental components like textured matting, elaborate corner accents, or bespoke engraving, custom frame design will improve visual attractiveness. A well-coordinated presentation requires that these components be consonant with the artwork. To keep the acrylic surface clear and brilliant, it must be polished and cleaned. To stop scratches and keep the frame looking fresh, use a microfiber cloth and an appropriate acrylic cleaner. Enhance your projects with clear acrylic cut to size, providing a precise fit and flawless finish for any design.
Displaying Your Custom Frame
Take various display configurations into consideration when framing your artwork to optimize its effect. While tabletop frames work well in workplaces or bedrooms, wall-mounted frames are best for living rooms or galleries. Lighting circumstances should even be taken into consideration because natural light will intensify colours but also can wane with time. To enhance the artwork's visually appealing display, place it out of direct sunlight and confirm there's enough light.
Maintenance and Care
An acrylic frame should be cleaned with the proper chemicals and often dusted to preserve its integrity. Cleaners with an ammonia basis should be avoided since they could harm the acrylic surface. For long-term care, keep the artwork in a climate-controlled space to avoid warping or discolouration. Following these recommendations will guarantee that the artwork and frame stay in top shape and still be beautiful for several years to come. Whether for displays or furniture, custom cut acrylic glass offers the flexibility and durability needed to match your unique requirements.
Conclusion
Private expression is made possible by the improved protection that custom acrylic frames offer for artwork. They supply a particular presentation and encourage a better bond with the artwork. For people who are hooked on art and elegance, designing a custom frame is a worthy task since it provides a large amount of enjoyment.
Post Your Ad Here
Comments