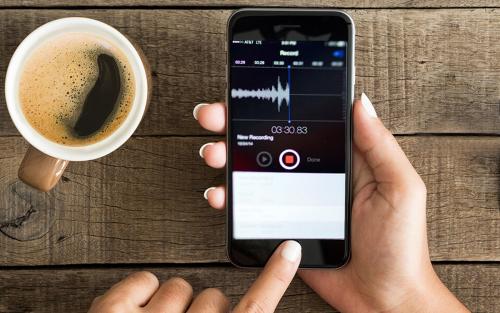
How to Record Anything with Voice Memos on iOS

iOS devices come with inbuilt Voice Memos app. Be it recording a part of a lecture to make sure you don’t forget what’s being taught or to record your dog’s snores, Voice Memos app is the best tool. This free app is easy to use. If you want to know about the process of using this app on your iOS device, then here’s how.

Process of Recording Voice Memos on iPhone
- Unlock your iPhone.
- Go to the Home screen.
- Find the Voice Memos app and tap on it.
- Tap on the record icon. It resembles a huge red colored circle.
- Touch the white icon at the upper side of the record tab.
- This will reveal the option for pausing.
- For pausing the voice recording, press the pause option.
- After that, tap on the Resume button to carry on the voice recording in the same file.
- Tap on the Done button once you have finished recording.
The voice recording shall be visible in the menu at the top of the record tab.
Process of Playing Voice Memos on iOS Devices
Users can play voice recordings from the Voice Memos app.
- From the Home screen, find the Voice Memos app.
- Tap on it to open it.
- The app might be in the utility folder in case the users have not shifted it.
- Users need to select the Voice Memo they want to play.
- Hit the Play button.
Process of Sharing Voice Memos on iOS Devices
Voice recordings can be sent from iMessage, email, etc.
- Open the Home screen of the iPhone or iPad.
- Select the voice recording you want to share.
- Press the more option at the lower left-hand side of the selected recording. It represents ellipsis.
- Press the Share option from the pop-up.
- Now, select how you wish to share the Voice Memo.
- Follow the instructions on the screen.
Process of Editing Voice Memos
Seldom do recordings begin and end flawlessly. If the users want to cut out any useless sound, they can do it within the Voice Memos app.
- Open the Voice Memos app on the iPhone or iPad.
- Touch the recording that is to be trimmed.
- Press the more icon located at the lower left side of the selected recording.
- Touch the Edit Recording option.
- Select the trim option located at the top right-hand side of the voice recording.
- Move the trimming slider from the ends of the voice recordings for trimming it.
- Touch the Trim option.
- Or else, tap on the Delete button to remove the segment between the trimming sliders.
Process of Renaming Voice Memos on iOS
- Open the Voice Memos app on your iPhone or iPad.
- Select the voice recording that is to be renamed.
- In case you want to change the name of the voice recording, then it can be easily renamed.
- Open the Voice Memos app on your iOS device.
- Select the voice recording you want to rename.
- Tap on its name.
- When it gets highlighted, type the new name.
- Tap anywhere else on the screen.
You have now successfully renamed the recording.
How to Delete Voice Memos on iOS Devices?
Here is the quickest method of removing voice memos:
- Open the Voice Memos application on your device.
- Tap on the recording that you want to remove.
- Hit the Delete button located at the lower right corner of the selected recording.
Billy Mark is a self-professed security expert; he has been making the people aware of the security threats. His passion is to write about Cyber security, cryptography, malware, social engineering, internet and new media. He writes for Norton security products at www.norton.com/setup.

Comments