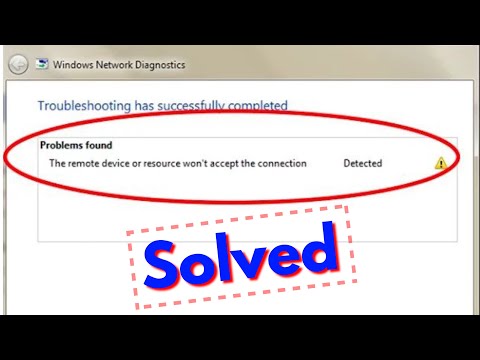
How to Fix “The Remote Device Won’t Accept the Connection” Issue?
Many computer or laptop users are confronting this ‘Remote
device won’t accept the connection’ issue. Though this issue is quite common
and occurs whenever users try to access the internet with a browser; this
message pops up on the screen. Well, there are various reasons behind this
error, which are as follows:
- Corporate Network Connection
- Malware
Corporate Network Connection: if any user has connected their
device to the corporate network, then the IT department might have changed the
LAN settings to easily use their proxy server to access the internet connection
easily. Whenever these settings remain the same during the time users are
connect from home network, then this errors occurs on the screen.
Malware: There are several sorts of malware available over the
internet that will change your LAN settings to direct your whole traffic via a
malicious proxy server.
However, the solutions to these types of glitches depend upon
the causes of the errors. Well, the ‘ The Remote Device Won’t Accept the
Connection’ error message is associated with how the internet traffic is routed
while using a web browser. Whenever your system is configured to use a proxy
server, all of the internet connection requests are routed to that proxy
server. After that, the proxy server handles all traffic between the internet
connection and your computer system. Here are some solutions which help you in
troubleshooting the issue which is discussed below.
Steps to Troubleshoot
LAN Proxy Settings
One of the easiest ways of fixing this issue is to remove the
Proxy Server from your LAN settings. But before you go through the steps, e suggest
you follow the steps in the same way as given below. This will save your time
and efforts, prevent unwanted errors and troubles. Here how to do it:
1. Click on the ‘Start
Menu’ icon to launch it.
2. In the ‘Start Menu’
section, type ‘Internet Options.’
3. Then, click on the
‘Internet Options’
4. Inside the ‘Internet
Properties’ section, choose the ‘Connections’ tab and click on it to open it.
5. Uncheck the Use a
Proxy Server for your LAN’ option located on the connection tab.
6. Choose ‘Automatically
Detect Settings’ option and tap on it.
7. Wait for a few
minutes; one should observe that you are able to access the internet with your
web browser without noticing the error message which says ‘ The Remote Device
Won’t Accept the Connection.’
Steps For Resetting
Internet Explorer Settings
Are you using Internet Explorer? The above-mentioned solution
doesn’t help you out from the issue? Try this resetting Internet Explorer
setting option. This method might help you in fixing the problem, here how to
do it:
1. Firstly, click on the
‘Internet Options’ tool to launch it on the screen.
2. Choose and click on
the ‘Advanced’ option.
3. Tap on the ‘Reset’
tab appears in the ‘Reset Internet Explorer’ settings.
4. Checkmark the ‘Delete
Personal Settings’ box.
5. After that, choose
‘Reset’ tab appears on the screen.
6. Lastly, reboot your
computer system.
7. Then, try to launch
Internet Explorer and access any of the websites.
Devin Smith is a Microsoft
Office expert and has been working in the technology industry since 2002. As a
technical expert, Devin has written technical blogs, manuals, white papers, and
reviews for many websites such as office.com/setup.
Source : The
Remote Device Won’t Accept the Connection.
Post Your Ad Here
Comments