 Articles
How to Fix “Invalidfont” Error When Printing
by Jack Arona Computer ServiceToday we are using various file formats to store and share our documents on multiple sites in several ways. There are various file formats such as PDF, JPG, .doc, .xls, etc. and among these data formats, PDF is one of the widely used and renowned file formats that work globally in all the websites. It is also a compatible format to keep your data more secure than any other format.
SOURCE:-How to Fix “Invalidfont” Error When Printing
PDF enables the user to print any file effortlessly, and it accepts the standard font size and page orientation, but while printing a PDF file, some users face the printing issues. This issue is related to the invalid format in the formatting of the file. In this case, the system flashes the error code “Invalidfont” error.
In some cases, this printing error comes with various error codes on your Windows 10. You can face the error message as “ERROR: invalid font” on your device.
Reasons for Error “Invalidfont” to Occur on Your PC
There are various reasons that we face “Invalidfont” errors in our system. It might be due to an improper configuration format, or you are running on the outdated edition of the PDF viewer.
Other reasons include invalid font name or incorrect way of formatting. It might be possible that some words are not associated with any available dictionaries. Pursue these instructions if you wish to know how to fix this printing issue on your printer:
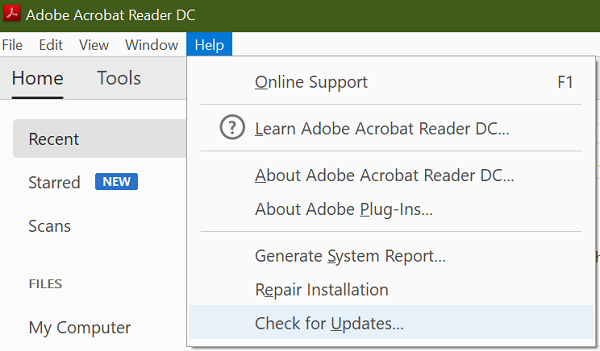
Checking for latest Updates
- First and foremost, open your Adobe Acrobat Reader DC. You may open any of your desired PDF viewers.
- After that, press the Help tab by navigating the toolbar.
- Next, hit the Check for Updates option.
- Now, Acrobat Reader will undergo scanning all the pending system updates. If any found, hit on the Install Updates button to download the available update.
- Then, exit from the expanded window and then start your PDF viewer once more for checking recent improvements. If not found, then you will get the message regarding the same.
Resetting Acrobat Preference Setups
- In the beginning, launch File Explorer and go to the under mentioned location on your PC:
“C ![]() Users\ [user_name]\ App_Data\ Roaming\ Adobe\ Acrobat\ [version].”
Users\ [user_name]\ App_Data\ Roaming\ Adobe\ Acrobat\ [version].”
- Then, rename the following folders: Security and JSCache.
- In case you are working on Windows 7, then it is recommended to move your Preferences folder to any other location.
- In case you find the Preference folder is not showing on your device, launch the View tab that will be located inside File Explorer.
- After that, mark the box related to hidden items. It will show all the files that are situated inside the folder.
- When you have successfully moved your Preference folder, then exit from the expanded window and start Acrobat Reader again. This action will reset all the preferences of your Acrobat Reader.
- Adobe will regenerate the mandatory folders just after restart operation.
- Now, print a PDF file and make sure that there is no issue occurring.
Deactivating System Font Reliability Feature
- At the start, launch the PDF reader of Adobe.
- Now, expand the PDF file that you wish to print and then press two different keys simultaneously: Ctrl + P.
- After a while, Print Window will appear and then select your preferred printer for printing.
- Press the Properties section there.
- Launch PDF Settings of Adobe.
- Now, ensure to unmark the option related to system reliability.
- Then, press the OK button to save modifications that you have made.
- After that, restart the PDF reader application and scan for any further improvements.
Printing the PDF File as Image
This option makes your document widely compatible with even mini devices such as smartphones etc. To print your document as an image file, continue with these steps:
- First and foremost, launch your PDF document under Acrobat Reader.
- Now, hit the File option.
- After that, press the Print button.
- Next, hit the tab Advanced.
- Press on the option “Print as Image.”
- Tap on the OK button to proceed.
- Finally, print a document, and then scan your device for further improvements.
Using MS Word Application to Save the File as PDF
- First and foremost, expand the PDF file in MS Word.
- Navigate to the uppermost section of your page and hit the option “Enable Editing.” This action allows you to edit your PDF file in Word.
- After that, tap on “File” and then hit the” Save as” option there.
- Choose your desired folder.
- Ensure to save your document as PDF by hitting the Save tab.
- Next, launch your PDF document on your preferred PDF viewer.
- At last, try to print the file and make sure that there is no issue arising.
Note: In case you are still experiencing the issue, then it is recommended to use PSL drivers on your device. Users may visit the manufacturer’s site to get support regarding the printing issue.

Jack Arona is a creative person who has been writing blogs and articles about cybersecurity. She writes about the latest updates regarding mcafee.com/activate and how it can improve the work experience of users. Her articles have been published in many popular e-magazines, blogs, and websites.
Sponsor Ads
Created on Apr 8th 2020 04:18. Viewed 234 times.

