Step-by-Step Guide For Carpet Patching
Carpet patching is a valuable skill for any homeowner or renter to have. It allows you to repair damaged areas of your carpet without having to replace the entire thing. Whether you have a small burn mark, a stubborn stain, or a ripped section, carpet patching can be a cost-effective and efficient solution. Let’s explore the step-by-step process of carpet patching, helping you restore the beauty and functionality of your carpet.
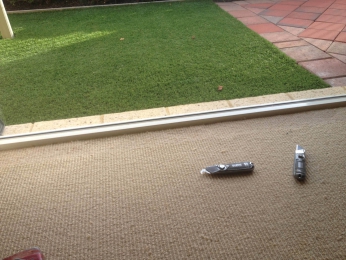
Step; 1: Gather the necessary tools and materials:
Before you begin patching your carpet, it's crucial to gather all the required tools and materials. We have listed down what you may need:
- Carpet patch or remnant: Obtain a piece of carpet that matches the style, colour, and texture of your existing carpet.
- Utility knife: A sharp utility knife will help you cut the carpet accurately.
- Straightedge: Use a straightedge, such as a ruler or a level, to guide your cuts.
- Carpet adhesive: Choose a high-quality carpet adhesive suitable for your carpet type.
- Double-sided carpet tape: This is optional but can provide additional support for the patch.
Step 2: Prepare The Damaged Area:
Start by assessing the damaged area on your carpet. If there are loose fibres or frayed edges, trim them carefully using a pair of scissors. It's essential to create a clean and even edge for the patch to blend seamlessly.
Step 3: Cut Out The Damaged Portion:
Using a straightedge as a guide, use the utility knife to cut out the damaged portion of the carpet. Make sure your cut is straight and follows the shape of the damaged area. Take your time to achieve precision.
Step 4: Cut The Patch:
Take your carpet remnant or patch and cut out a piece that matches the size and shape of the hole you created. Again, use a straightedge to guide your cuts and ensure accuracy.
Step 5: Place The Patch:
Carefully place the patch into the hole, ensuring that it fits snugly and aligns with the surrounding carpet fibres. Take a moment to check the pattern and direction of the carpet to ensure a seamless blend.
Step 6: Attach The Patch:
Depending on the type of carpet adhesive you're using, follow the manufacturer's instructions for application. Apply the adhesive evenly to the edges of the patch and press it firmly into place. You can also use double-sided carpet tape for added security.
Step 7: Blend The Patch With The Surrounding Carpet:
To create a seamless transition between the patch and the surrounding carpet, use a carpet brush or your fingers to blend the fibres together. This will help the patch become less noticeable and ensure a smooth, uniform appearance.
Step 8: Allow The Adhesive To Dry:
Give the adhesive enough time to dry completely. Follow the manufacturer's recommendations for drying time. It's crucial to avoid stepping or placing heavy objects on the patched area until the adhesive has fully cured.
Carpet patching helps to revive your old patched-up carpet. The carpet patching technique is a step-by-step process. Here’s how to conduct it.
Carpet patching is a valuable skill that can save you money and extend the life of your carpet. By following these step-by-step instructions, you can successfully repair damaged areas in your carpet and restore its aesthetic appeal. Remember, patience and precision are key to achieving a seamless patch. With practice, you'll gain confidence and become proficient in this essential home maintenance technique.
1 people like it

Advertise on APSense
This advertising space is available.
Post Your Ad Here
Post Your Ad Here
Comments