PHP Directory Listing Management System: Organize and Manage Your Files with Ease

Directory Listing Management System in PHP with Source Code
‘Directory Listing Management System using PHP’ is a web-based application that provides a technology-based platform to users to take care of their daily needs. This application manages all critical minor concerns. It can help users to get the service of locality at the doorstep and list their services on the site. It is a web application that serves as a platform for users and service providers to interact with each other about delivering the desired service. ‘Directory Listing Management Project ’ stores the details and information of the on-call workers or Freelancers and Companies so when the people or company needed service for any type of services they needs can simply search from the website that is available or can give service in their area. In this project, there are two modules i.e. admin and user.
Project Requirements
| Project Name | Directory Listing Management System project in PHP |
|---|---|
| Language Used | PHP5.6, PHP7.x |
| Database | MySQL 5.x |
| User Interface Design | HTML, AJAX,JQUERY,JAVASCRIPT |
| Web Browser | Mozilla, Google Chrome, IE8, OPERA |
| Software | XAMPP / Wamp / Mamp/ Lamp (anyone) |
Features of the Project
DLSM Project has two modules i.e. Admin and user.
Admin
- Admin Setting: In this section, admin can update his/her profile, Change their password, and log out.
- Dashboard: In this section, admin can briefly view the total number of categories, total number of registered users,s and total listing added by registered users.
- Service Category: In this section, the admin can manage the category (Add/Update).
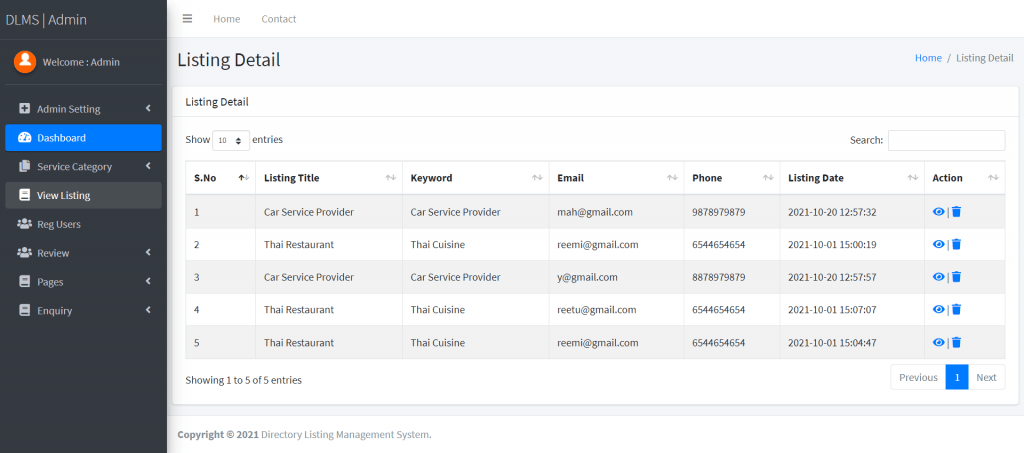
- View Listing: In this section, the admin can view the listing which is listed by registered users and also delete garbage listing.
- Reg Users: In this section, the admin can view the detail of registered users.
- Review: In this section, the admin can view the review given by the service users.
- Pages: In this section, the admin can manage about us and contact us pages.
- Enquiry: In this section, the admin can view the inquiry which is sent by users.
To get Full Article & Free Access : https://phpgurukul.com/directory-listing-management-system-using-php/
User(Un-Registered User)
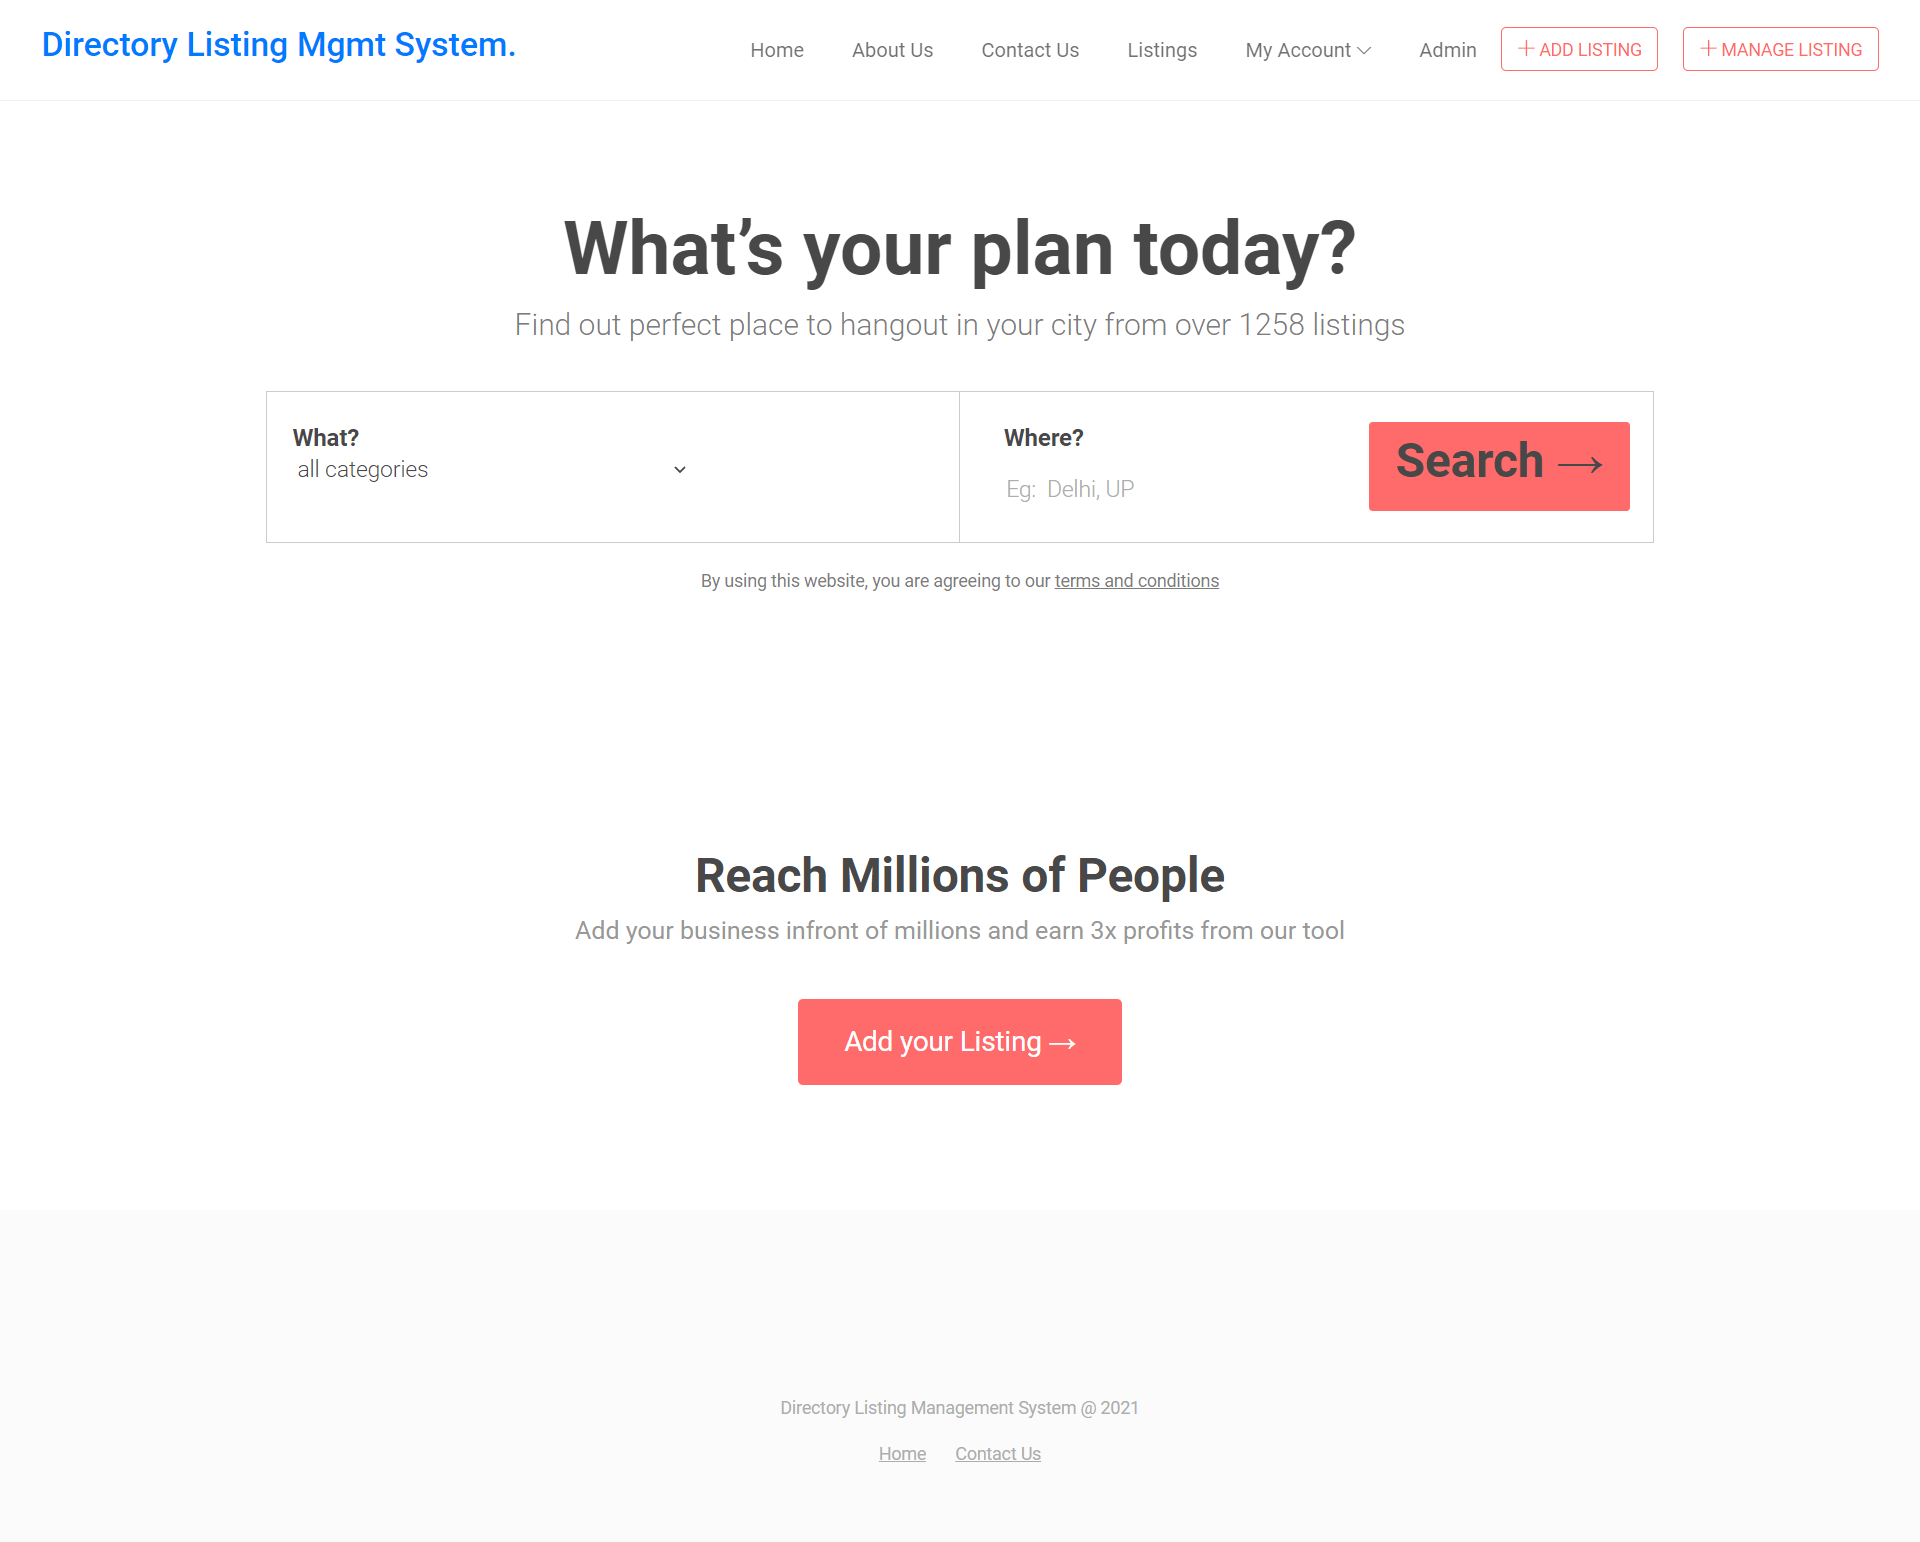
- Home Page: User can visit the home page and view listing details.
- About Us: User sees the details of .website administrator.
- Contact Us: User can contact a website administrator.
- Listing: User can view different-different services which are listed by the service provider.
User(Registered User)
- Home Page: The user can visit the home page and view listing details.
- About Us: User sees the details of .website administrator.
- Contact Us: The user can contact with the website administrator.
- Listing: The user can view different-different services which are listed by the service provider.
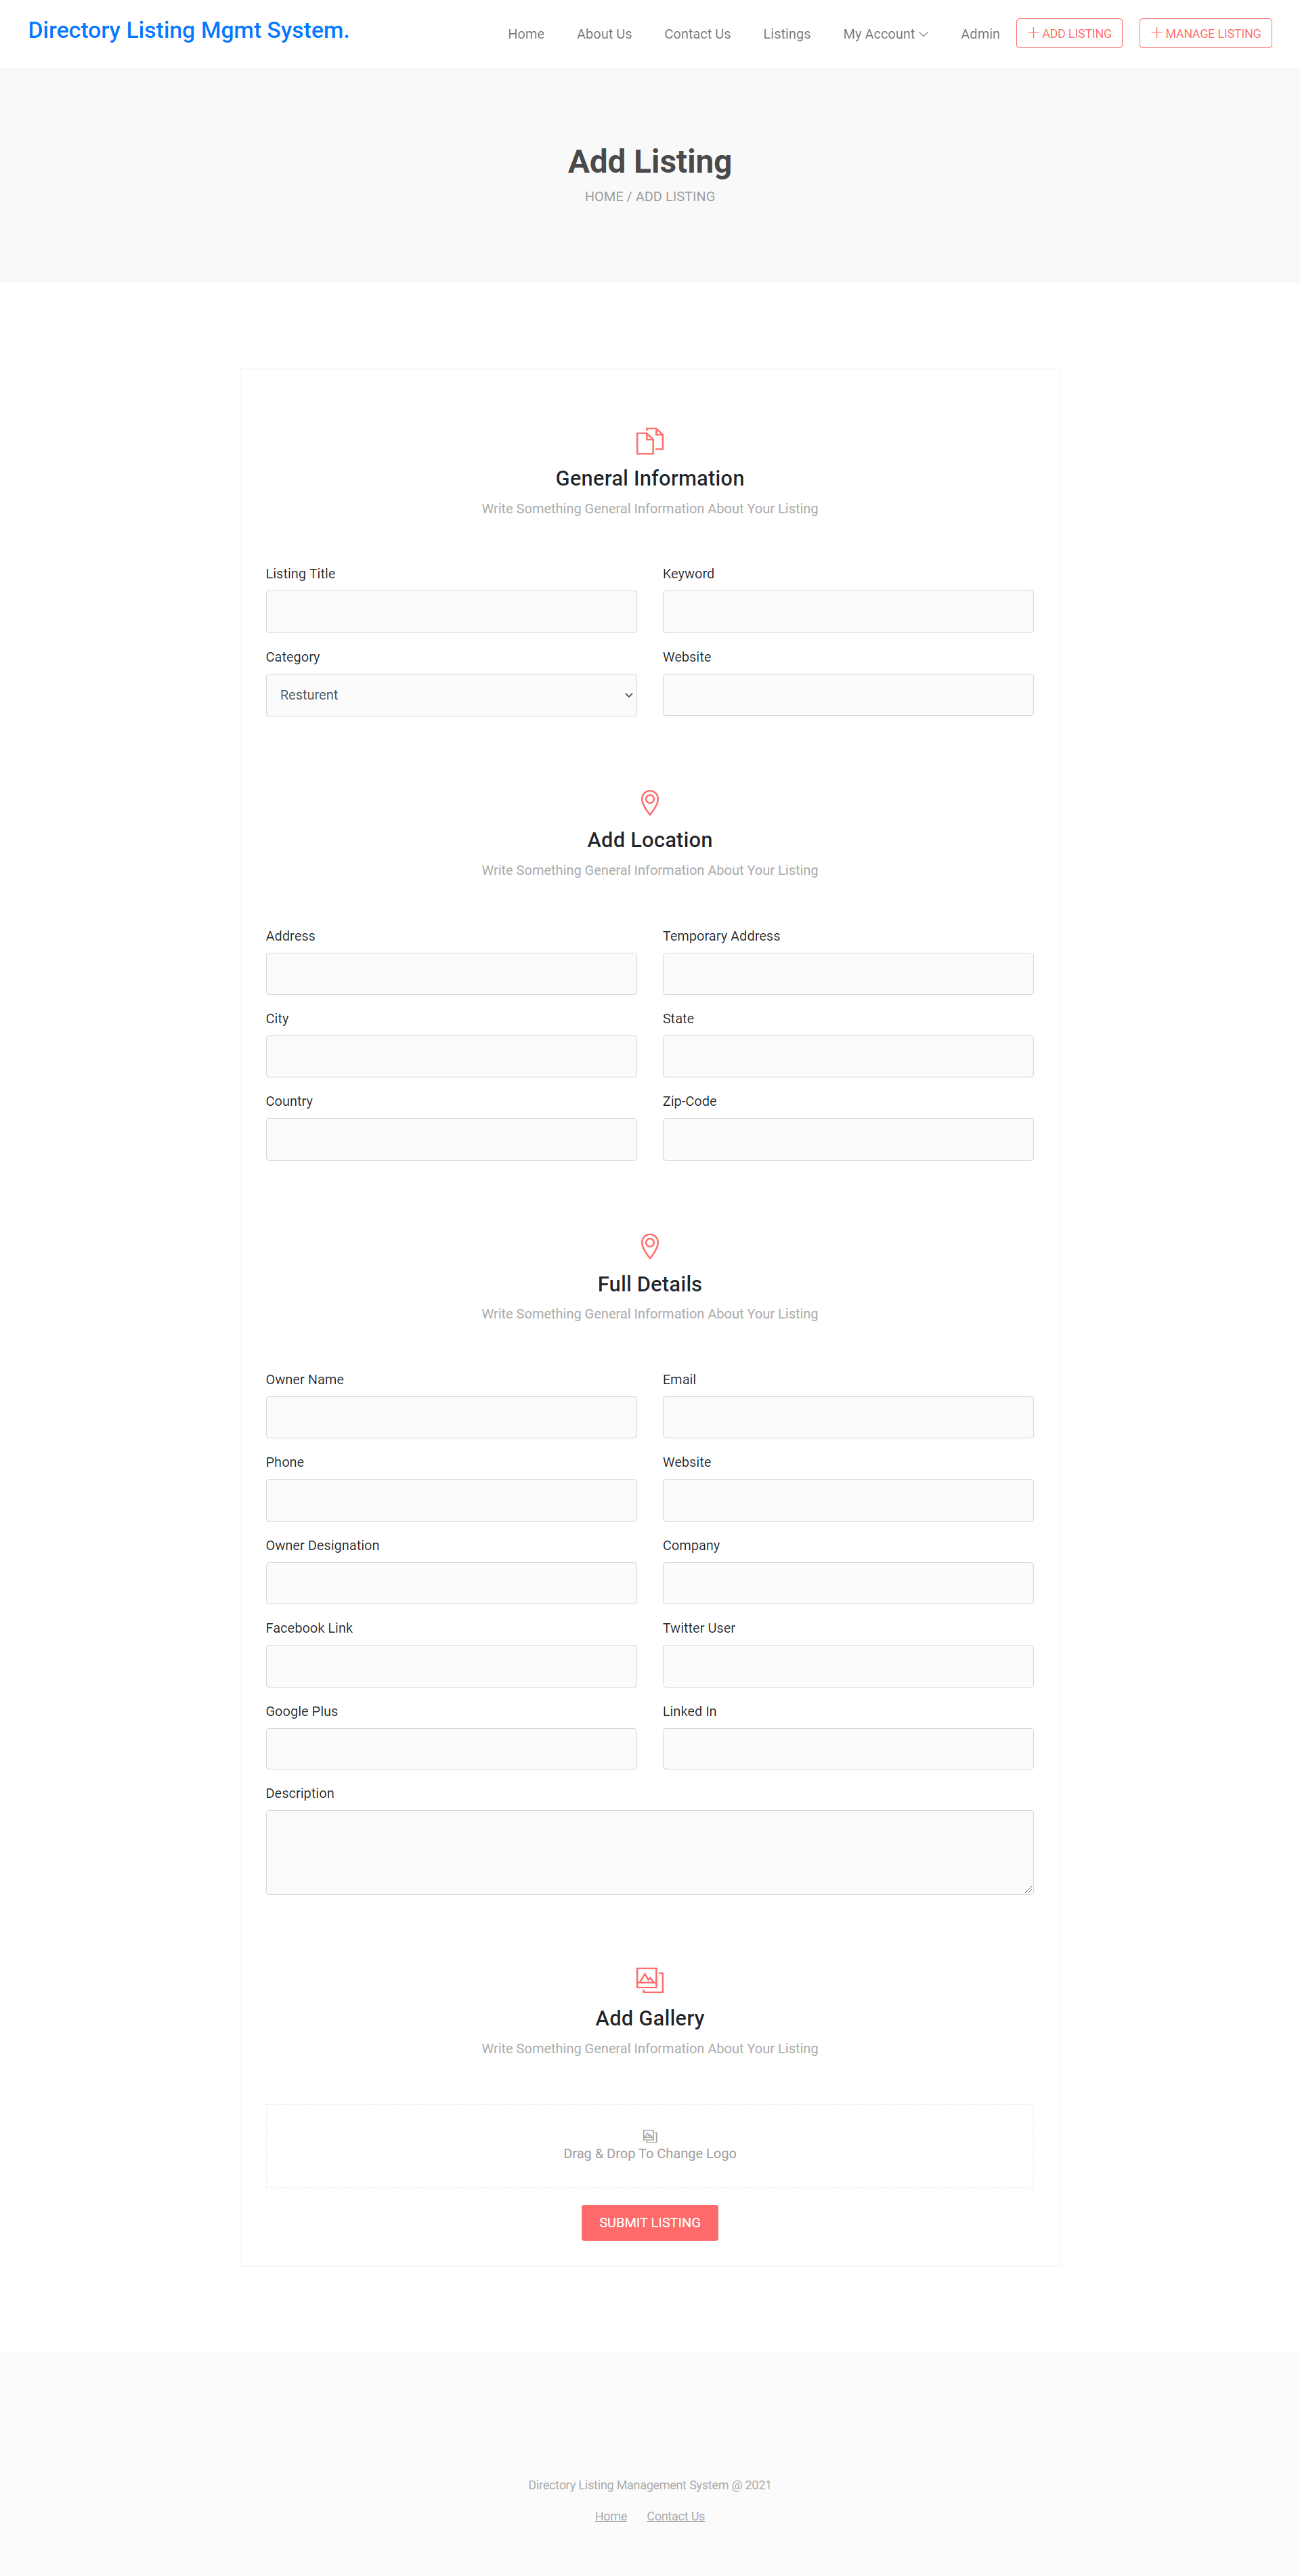
- Add Listing: In this section, user list their services after registering himself or herself.
- Manage Listing: Registered user can manage their listing by updating and deleting.
- My Account: In this section, user can manage profiles and change their password.
A Directory Listing Management System is a web-based application that allows users to manage and organize files and folders on a server. In this system, users can upload, delete, rename, move, and download files and folders.
Here are the steps to create a basic Directory Listing Management System using PHP:
- Create a directory on your server where you want to store the uploaded files.
- Create a PHP script that will handle file uploads. In this script, you can use the $_FILES superglobal to access the uploaded file and move it to the directory you created in step 1.
- Create a PHP script that will display the contents of the directory. You can use the opendir() function to open the directory, readdir() function to read the contents of the directory, and closedir() function to close the directory.
- Create a form in your display script to allow users to upload files. This form should have an input field with the type set to "file" and a submit button.
- Add functionality to your display script to allow users to delete files and folders. You can use the unlink() function to delete files and rmdir() function to delete folders.
- Add functionality to your display script to allow users to rename files and folders. You can use the rename() function to rename files and folders.
- Add functionality to your display script to allow users to move files and folders to a different directory. You can use the rename() function to move files and folders.
Output Screen of the Project
Home Page
Add listing Page
Admin Dashboard

Admin Listing Details
How run DLMS Project using PHP
- Download the zip file
- Extract the file and copy
dlmsfolder - Paste inside root directory(for xampp xampp/htdocs, for wamp wamp/www, for lamp var/www/html)
- Open PHPMyAdmin (http://localhost/phpmyadmin)
- Create a database with name
dlmsdb - Import
dlmsdb.sqlfile(given inside the zip package in SQL file folder) - Run the script
http://localhost/dlms(frontend)
Credential for admin panel :
Username: admin
Password: Test@123
Credential for User Panel :
Username:1234567890
Password: Test@123
PHP Gurukul
Welcome to PHPGurukul. We are a web development team striving our best to provide you with an unusual experience with PHP. Some technologies never fade, and PHP is one of them. From the time it has been introduced, the demand for PHP Projects and PHP developers is growing since 1994. We are here to make your PHP journey more exciting and useful.
Website : https://phpgurukul.com

Post Your Ad Here
Comments