Metro Exodus: Guide to Every Upgrade and Side Missions
There are plenty of Metro Exodus map areas in its latest open-world levels. Most of the game’s best gear and moments are present in the odd corners of the Taiga, Caspian and Volga areas. Because gamers have to explore and utilize their binocular to spot points of interest. However, it is surprisingly convenient to miss some things, and no one realized when they walk past an item. In case you want to attain all the things and experience altogether, then scroll down and check out the guide to learn about every upgrade and side missions.
Metro Exodus: Use the Binoculars –
Before you go anywhere in the game, here are the quick and efficient tips, “utilize your binoculars to look around daily.” A pair of binoculars will be available after meeting the Krest, an engineer, on the crane to find at some locations he calls out. Any location worth visiting will create a clicking sound as a user looks over it.
In case a gamer holds that position and zoon in, one should hear a whir and spot a map icon pop up, showing a location has been marked on the map. Moreover, if there is no clicking sound and icon, then try zooming out and in. After that, you will need to move around nearby as it worth to see and discover new different places.
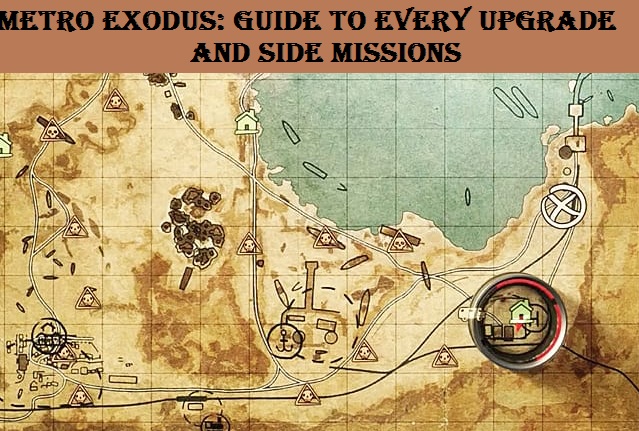
Metro Exodus: What do the icons mean?
In the game, four icons are present on the Metro Exodus map represents:
- Next main objective (Big White Cross).
- A safe house with a bed to change day time and workbench to craft (a Green Building).
- Indicated Enemies (Red Hazard Skull and Bones).
- Unknown (Question Mark).
Metro Exodus: Upgrades and Gadgets –
1. Sniper Compass and Scope:
Players will locate a crashed plane in the Volga with a sniper scope and compass, which will help to find your upcoming objective.
2. Kalash Rifle Upgrades:
In the Volga, there is a small outpost in which one will easily locate a few good early Kalash rifle upgrades in order to enhance the stability and damage. Some ruined structures are simply beams and pillars.
Search for a few shipping crates and ramps, which will take users up near one of the beams. Now, follow the beam around to get a ladder and outpost in the game. At last, you will locate a Kalash long barrel, heavy stock, and compensator for an accuracy boost along with massive damage.
3. Tsar Fish room key and Ammo Pouches Upgrade:
Some prisoners present in the Volga location that users can release who will offer a key to unlock the room where you can get the night vision goggles. Also, there are ammo pouches upstairs, which will let you bring more bullets.
4. Night Vision Goggles:
As mentioned earlier, players will need to rescue prisoners and unlock the room to get the night vision goggles. However, gamers can also avail it by accomplishing the mission, i.e., eliminate the Tsar Fish.
5. Gas mask upgrades:
In the game, you will find a small shack full of spiders and fungus, where the Extended filter available. Well, it is an upgrade that will help to use your gas mark filters for a longer time.
6. Throwable ammo Upgrade:
In the Volga, there are some bandits that you need to eliminate. After that, make sure to explore inside to get the throwing weapon harness that will let to carry more grenades, knives, and Molotov cocktails.
7. Metal Detector:
In order to locate resources, you need to use the metal detector and equip it to the bracer. Thereafter, search for a broken down crane, and it will be available in front of a small rusted house. Try to break the lock off and get access accordingly.
8. 6x Sniper Scope:
As a part of the primary mission, gamers have to visit the crane and will probably be troubled by the sniper on your way. Try to locate sniper’s weapon when you eliminate him as there’s a 6x sniper scope for you to utilize.
9. Motion Tracker, Slave Rescue, and Gatling gun:
In the Caspian area, there is a shipwreck where you need to visit and gather necessary gear and upgrades. First of all, one can attain a Gatling gun in case they missed to pick up in Yamantau. Secondly, the ship is basically utilized by slavers, and if a user eliminates them and set the slaves free without hurting them, then it might benefit you later on the game. Finally, look for a motion tracker on the top side and place it on the bracer.
10. Extra Bright Light:
There is some booby trap set in some safe house, especially tripwire grenades. In any case, gamers will able to get in without activating any trap, and then one can access extra bright light to see broader and further in the dark. Make sure to use it wisely as it consumes the battery faster.
Aurora is an engineer by day and writer by night. Previously, Aurora worked as a certified technicians for a tech hardware startup. In her free time, she likes to write about printers, routers, web browsers, and other technical stuff. She majorly writes for canon printer support etc.
Source: https://legitdirectory.co.uk/blog/metro-exodus-guide-to-every-upgrade-and-side-missions/
Post Your Ad Here
Comments