 Articles
How to set up Volvo VIDA 2014 SP21-B
by Alex Carter Mechanic AssistantVolvo VIDA DiCE diagnostic scanner new package (Item No: SP21-B) comes with 2 software DVDs/CDs (Item No: SP21-A/SP21-C comes with 1 software CD only). Setting up 2 software CDs is different from 1 CD.
Note: If you have only 1 software CD, follow instruction here to install VIDA 2014D.
http://vidadice.blogspot.com/2017/11/install-volvo-vida-dice-2014d-on-windows-7.html
If you have 2 software CDs in DiCE package, follow guide below to install software.
How to install Volvo VIDA 2014D with 2 Software CDs on Windows 7 64 bit?
Volvo Vida Dice Requirement on computer:
1. It must be Windows 7 professional operating system
2. It need to be Internet Explorer 9 !!!
3. Computer memory needs to over 3GRAM
4. C:// must have 40GB space
5. Software must be installed under C://
6. It must be NTFS format
Step 1: Install VIDA Setup
Launch Windows Internet Explorer 9
Click on Setup->About Internet Explorer

Delete IE9 Windows 7 x86 enu shortcut on desktop
Open VIDA2014.1 software CD
Copy VIDA2014D.part1 and paste it to Computer/Software (D:)
Open VIDA2014.1 software CD
Copy VIDA2014D.part1 and paste it to Computer/Software (D:)

Open VIDA2014D.2 software CD
Copy VIDA2014D.part2 and paste it to Computer/Disk D

Then extra VIDA2014D.part1 zip file
Open VIDA2014D.part1 folder
Copy and paste Patch VIDA 2014-A-B-C-D to desktop

Open Software (D:)/VIDA2014D folder->Install->DVD->Vida_dvdheader->Main
Run Setup as Administrator

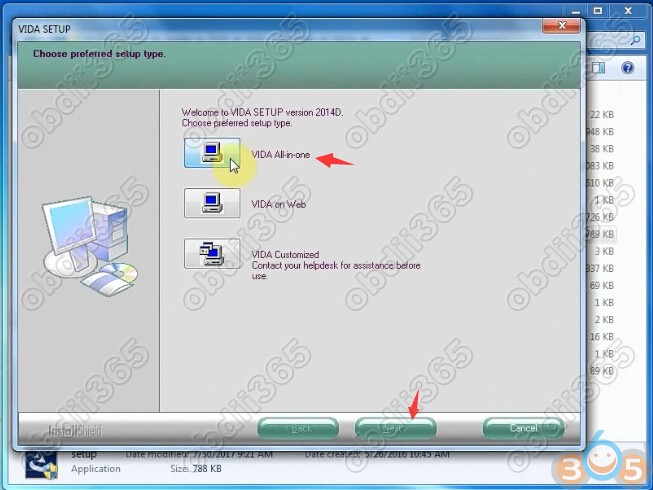
Select software language

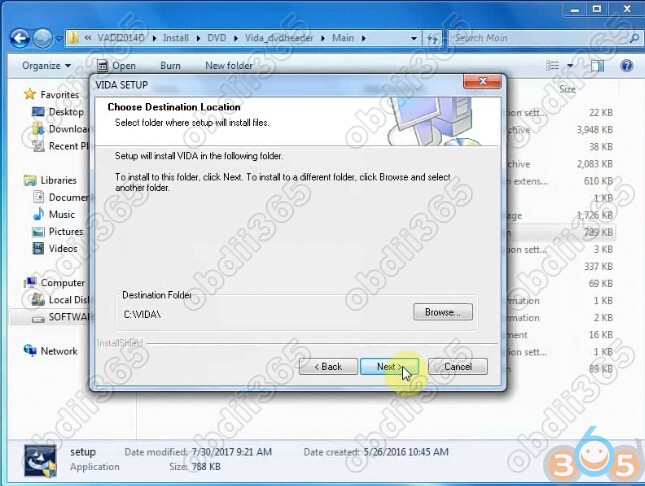
Choose destination location C://VIDA/, press Next
Accept license agreement,press Next
Installing Framework35
VIDA installation in progress. Wait until the installation is completed
Installation complete will generate a few files on desktop
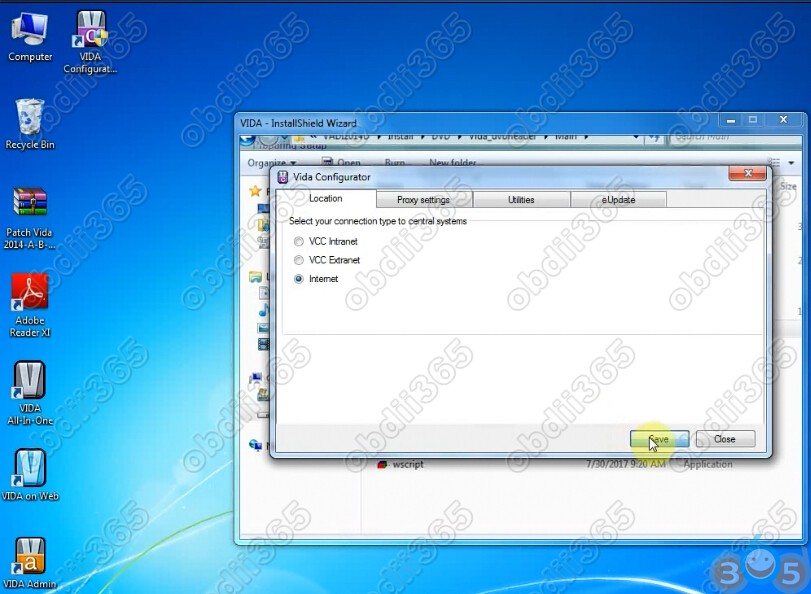
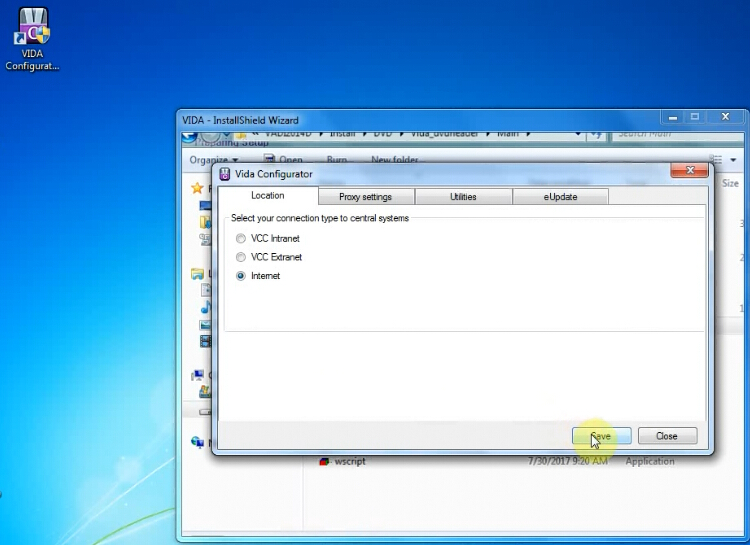
open Vida Configurator
Select connection type to central systems as "Internet" and Save
VIDA Setup finished, select restart computer later

Step 2: Install Patch VIDA 2014D
Extra Patch VIDA zip file and paste patch 2014A.exe on desktop

Install patch, select destination folder to C://,press Install
Connect Volvo DiCE interface with computer via USB port System will automatically install the driver DiCE-206751 @ 000000000000 device driver successfully installed
Allow windows firewall access
Delete Patch, Adobe Reader XI and 2014A.exe on desktop

Step 3: Run Self Test
Run Vida All-in-one as Administrator

Enter Username:1 and log in
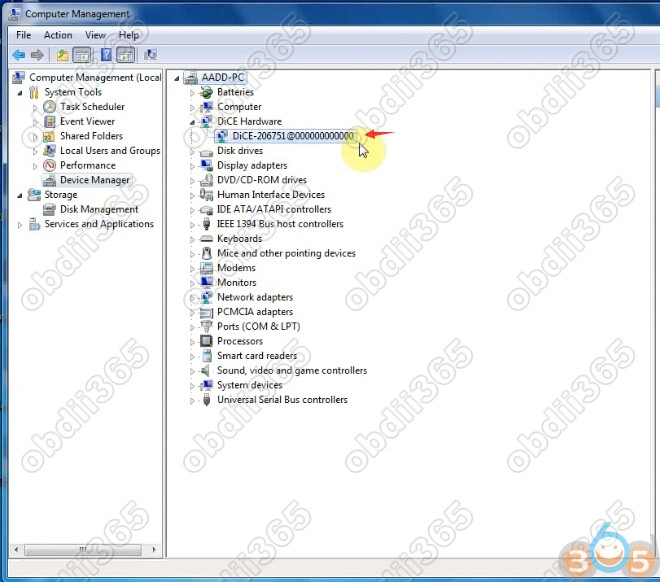
Open Computer->Manager->Device Manager->DiCE Hardware to check scanner is well connected
Define vehicle profile
Select Communication Tool: DiCE-206751
Press DICE Configuration->Test Communication Tool

Click Run to run self test
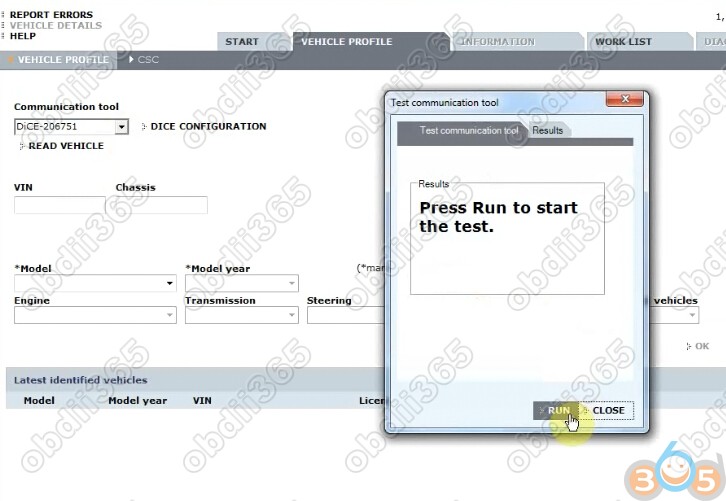
Self test okay
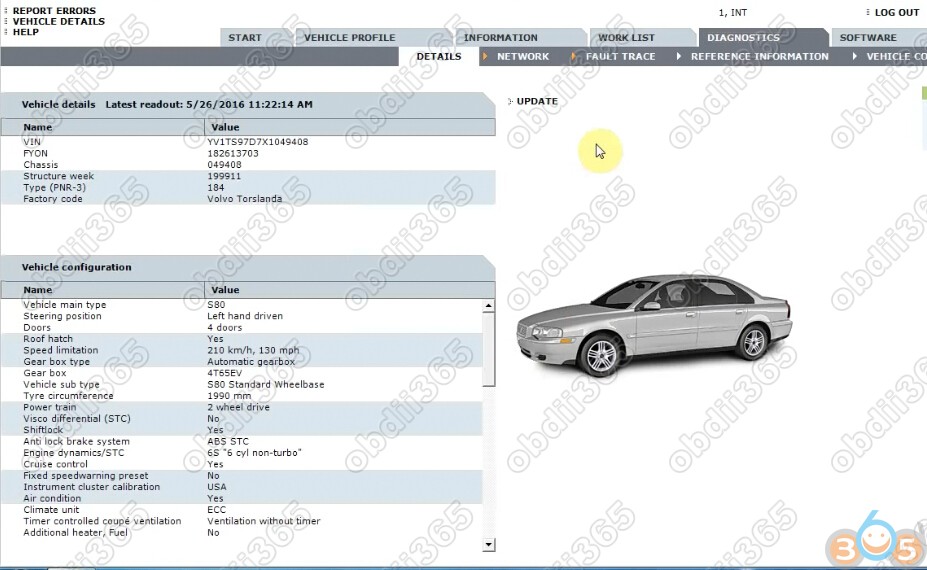
Connect DiCE unit with vehicle
Read vehicle information and run diagnostic function

Sponsor Ads
Created on Mar 26th 2018 22:21. Viewed 779 times.

Comments
No comment, be the first to comment.

