How to Remove the McAfee Products from the Windows Device?
McAfee has been developing the antivirus software since years for protecting its users against the online threats (like viruses, spyware, malware and other cyber-attacks) and thus, securing their devices as well as data from being used by the malicious users. Some of the popular McAfee products are McAfee LiveSafe, McAfee SiteAdvisor, McAfee VirusScen and many more. Sometimes the users need to uninstall or remove the McAfee antivirus installed on their Windows device for installing the new McAfee subscriptions on it. In the below mentioned details, I am going to detail the easiest procedure to remove the McAfee product from the Windows device.
Methods for Removing the McAfee Product from the Windows Device are as follows:
The users may remove the McAfee Products from the Windows device by using either of the two methods mentioned below:
Method 1: Remove Using Windows
- First and foremost, go to the Start menu and then, select the “Control Panel” option.
- Now, from the “Control Panel” window, select the “Programs” option.
- From the sub-options of the “Programs” option, select the “Programs and Features” option.
- Now, a list will appear on the screen that displays all the software installed on the Windows device.
- From this list, select the McAfee Product and then, click the “Uninstall” option.
- After this, restart the device.
If the McAfee product is not removed successfully from the device then, the users may utilize the step-wise procedure detailed in the Method 2.
Method 2: Execute the McAfee Consumer Product Removal Tool (MCPR):
- Firstly, the users need to download the MCPR tool to their Windows Device.
- To do so, access the official McAfee website and then, go to the “Troubleshoot and Repair” page.
- Now, click the “Download and Run” button displayed in front of the McAfee Consumer Product Removal Tool.
- The MCPR.exe file gets downloaded to the “Downloads” folder (by default) of the device.
- Now, double select the .exe file by double clicking on it.
- And then, a security warning may appear on the screen. Here, click the ‘Yes’, ‘continue’ or ‘Run’ button as per the versions of the Windows operating system for installing the tool to the device.
- After this, the McAfee Software Removal window will appear on the screen. Here, click the “Next” button and select the “Agree” for accepting the End User License Agreement.
- Now, click the ‘Next’ button.
- The Security Validation screen will be displayed to the users. On this screen, type the characters as displayed on the screen as the validation code is case sensitive.
- At last, click the ‘Next’ button.
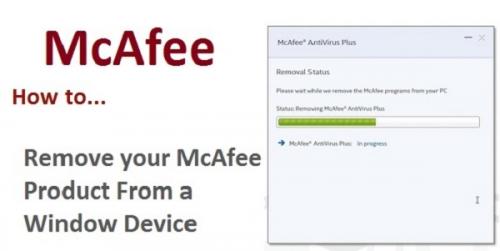
- The removal process will get started on the device.
- Once the process gets successfully completed on the device then, either of the two messages listed below:
a. Removal Complete: If this message is displayed on the screen then, restart the device.
b. Cleanup Unsuccessful: If this message is displayed on the screen then, restart the device and execute the McAfee Consumer Product Removal tool again on it.
If the users face any of the error or issues during the aforementioned procedures then, they may call the McAfee.com/Activate Customer Support on the McAfee toll-free number, to get an instant support for resolving the issues or errors, quickly.
Maria Williams is a renowned technical writer. She has been keeping a stern concern over the updates and errors of various anti-virus and security software. Through her blogs and articles, she strives to deliver the information in order to make awareness about the updates and error fixing methods.
Post Your Ad Here
Comments