How to Fix System_Service_Exception on Windows 10?
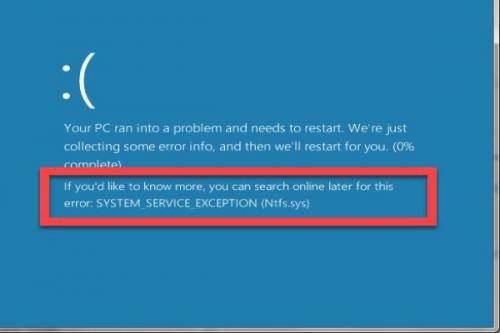
Windows can show multiple error codes and one of them is the service exception error. The users who are facing an error of System_Service_Exception on their Windows 10 devices should obtain resolve through below written instructions. The process is bit intricate, so it is suggested to be aware while reading this fix.
Launch Startup Repair
In case you intend to launch startup repair, then you can opt to follow the below-mentioned guidelines.
- First of all, restart the PC and then hold the ‘Shift + F8’ keys at the same time on your system to launch the options of Legacy Advanced Boot.
- Thereafter, click on the options window and pick the Troubleshoot option.
- Go to the Troubleshoot screen and click on the Advanced options.
- Reach the options of Advanced and click on the ‘Startup/Automatic Repair.’
- Now, the automatic repair button will start the scanning process for any problems and solve them.
- Finally, reboot the system and look for the issue.
Download MS Hotfix
If the users are trying to download MS hotfix, then they should carefully apply the given steps.
- You require to go to the link of Microsoft Support.
- After that, you should select the button of ‘Hotfix Download’ applicable and install.
- Now, once you install and reboot the system.
Matchable Driver Software Install
In case you intend to matchable driver software install, then you can opt to follow the below-mentioned guidelines.
- Hold the Win + R keys at the same time on your system to launch the Run section.
- Thereafter, input ‘devmgmt.msc’ into it and hit the Enter key to launch the Device Manager.
- You should deal with yellow color exclamation sigh system drivers.
- Now, pursue the on-screen steps to complete the updates of the driver.
- In case you are still incapable of solving the problem, then reach the driver and uninstall it.
- Then you should restart the system.
- Once you restart the PC, every driver gets installed itself.
- Also, you should reach the Intel Driver Update tool then download and install them.
- Once you install, launch the ‘Driver Update tool’ and select the Next button.
- Then admit the license agreement.
- Select the Install button.
- Once you finish the driver update of the system, select the launch button.
- Go to Start Scan and once you finish the driver scan procedure.
- Then select the Download button.
- You have to select the install button to install the newest Intel drivers for the PC.
- Once you finish the process of driver installation, restart the system.
Attempt to Delete KB2778344 Security Update
If the users are trying to attempt to delete the kb2778344 security update, then they should carefully apply the given steps.
- First of all, boot the Laptop/PC into the Safe Mode.
- Then, select the Control Panel and then click on the Programs option.
- Reach the Programs and Features option and click on it.
- You should select the ‘View installed updates.’
- Thereafter, select the ‘Security Update for Microsoft Windows (KB2778344)’ and click on the Uninstall button to remove the update.
- Navigate to the YES button into the verification box of ‘Uninstall and update.’
- Once delete the update correctly, restart the system.
Disable Services of Google Update
In case you intend to disable the services of Google update, then you can opt to follow the below-mentioned guidelines.
- Hold the Win + R keys at the same time on your system to launch the Run section.
- Thereafter, input ‘msconfig’ into it and hit the Enter key to launch the Services.
- You should select the Services option.
- Then browse and untick the box of ‘Google Update Service.’
- You have to select the Apply button and then the OK button.
- Now, restart the PC and look for the issue, it can be solved.
Solve Missing or Damaged System Files
If the users are trying to solve missing or damaged system files, then they should carefully apply the given steps.
- Go to the Start menu and right-click on it on your system.
- Then click on the Command Prompt option.
- Now, you will see a Command Prompt with admin privilege on your system.
- Once launch the command prompt you require to launch ‘sfc.’
- Type sfc /scannow’ and press the Enter key.
- Finally, it will start the scanning process and solve the errors.
Uninstall Specific Applications
In case you intend to uninstall specific applications, then you can opt to follow the below-mentioned guidelines.
- MSI Live Update
- Any VPN software
- AS Media USB device
- Western Digital Driver or any other External Hard Disk Driver.
- Nvidia or AMD graphic card software.
- McAfee (Disable don’t uninstall)
- Webcam (Disable)
- Virtual Clone Drive
- BitDefender
- Xsplit
Abigail Smith is a creative person who has been writing blogs and articles about cyber security. He writes about the latest updates regarding mcafee.com/activate and how it can improve the work experience of users. His articles have been published in many popular e-magazines, blogs and websites.
Advertise on APSense
This advertising space is available.
Post Your Ad Here
Post Your Ad Here
Comments