- Log in to Salesforce as an administrator.
- In the drop-down list of the account (in the upper-right corner), select Setup.
- In the left-hand pane, go to App Setup > Create >Apps.
- In the Connected Apps page, click the New button.
- On the New Connected App page, fill the following required fields under Basic Information: (Check Figure 1)
- Connected App Name.
- API name.
- Contact Email.
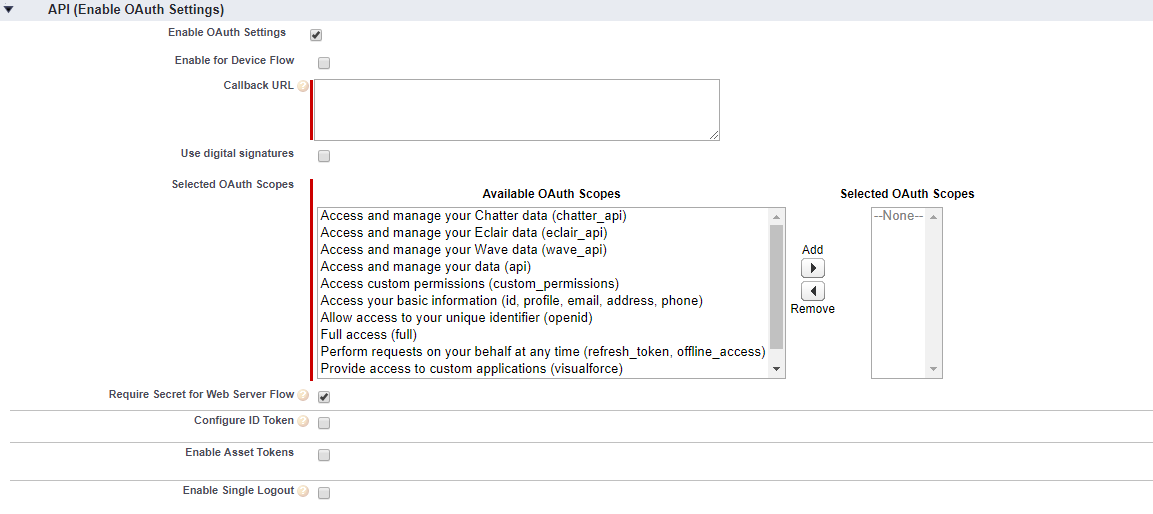
- Go to API (Enable OAuth Settings), and select Enable OAuth Settings.
- In the Callback URL field, enter https://login.salesforce.com/.
- In the Selected OAuth Scopes field, select Access and manage your data (API), and then click Add.
- Click the Save button to save the new Connected App.
- In the Connected Apps list, find the App that you just created, and then click Manage.
- On the page that opens, click the Edit button.
- Under OAuth policies, select All users may self-authorize in the Permitted Users list, and then click the Save button.
- Go back to the Connected Apps list, and click the App that you just created.
- Go to API (Enable OAuth Settings)(Check Figure 2)
How to Create Connected Apps for Salesforce Mobile Applications?
How to create connected Apps in salesforce :
Figure – 1
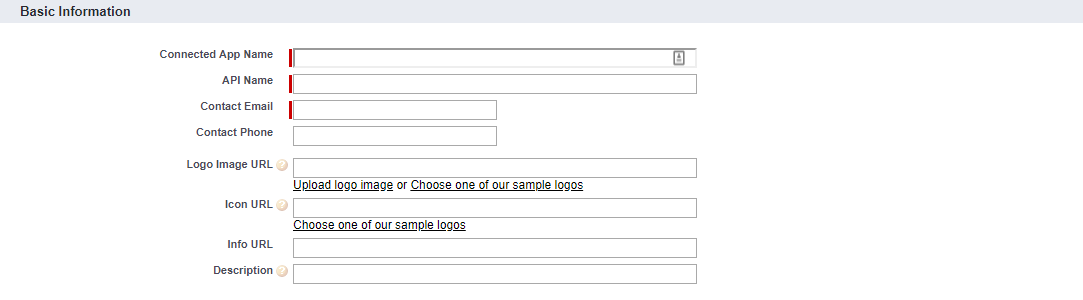
Figure – 2
Enter Web App Settings and Save
Scroll down to Web App Settings and do the following:
- Check Enable SAML
- Enter Screen Steps-Live for the Entity Id
- Enter the ACS URL from Screen Steps here. This is the SAML Consumer URL from the Single Sign-on End point you created in Screen Steps.
- Set Subject Type to Username
- Set Name ID Format to urn:oasis:names:tc:SAML:2.0:nameid-format:persistent
- Select Save.

Enter Custom Connected App Handler

In Apex Plugin Class enable for any specific user.
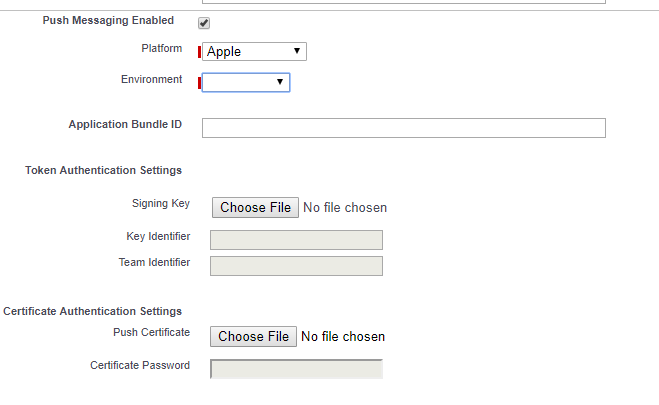
Enter Mobile Application Settings For(Anroid & iOS)

Here for mobile you have to give the mobile url.
For mobile Pin Protection or Push Messaging setting enable from mobile App Settings.
For Android or iOS you have to add binary file and certification add here related firebase account or whatever you have to used for push notification.
You have selection criteria over there what to use mobile or tablet or Mini Tablet or iPad.
For Push notification you have to enter the token authorization and certification authorization and upload signing Key and Push Certification

Enter Canvas Application Settings.
This setting used for Lightning Environment For chatter Feed, chatter Tab, Console, Layouts and Mobile cards, Lightning Component, Mobile Nav, Open CTI, Publisher and Visualforce page.
1 people like it

Advertise on APSense
This advertising space is available.
Post Your Ad Here
Post Your Ad Here
Comments