Fix: A problem occurred while creating the recovery drive
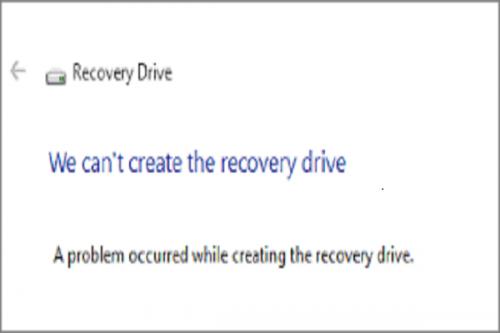
Creating a recovery drive is already a critical task. If something goes wrong at this stage, it can make a user really nervous. In this situation, several users run into the “A problem occurred while creating the recovery drive” error. If you are one of them, then we have the best solutions for you.
Here they are:
Format the Flash Drive
You should follow these directions as
given below:
- You should
connect the flash drive to the system.
- After that,
launch the File Explorer.
- Go to the flash
drive and right-click on it and select the Format option.
- You should
preserve the similar Allocation unit size and File system but don’t forget
to untick the box with Quick Format.
- Then select
Start. You will have to wait for the procedure to finish correctly.
- Afterwards,
click on the Yes button to verify the formatting of the flash drive.
- Once you finish
the formatting process, launch the ‘RecoveryDrive.exe’ once again and
check whether you are capable of making the recovery drive without facing
the issue.
Turn off MS Office Services
Here are the directions to follow:
- Hold the
Windows and R keys to launch the Run section.
- Then input
‘msconfig’ into it and hit the enter key to invoke the screen of System
Configuration.
- Once you reach
the System Configuration, select the Services section.
- Continue to
untick the boxes of Service related to the Virtualization Service Agent, Client
Virtualization Handle and Application Virtualization Client.
- After turning
off the services, select the Apply button to keep the changes.
- Reboot the
system, and you have to wait for the startup.
- After that,
launch the ‘RecoveryDrive.exe’ and try to make the recovery drive once
again.
- Now, you should
not face this error anymore.
Use Two-Step Recovery Trick
Here’s an interesting trick worth
trying:
- Hold the
Windows and R keys for Run.
- Then insert
“RecoveryDrive.exe” into it and select the OK button to invoke the
Recovery Media Creator tool.
- Once you reach
the first screen of Recovery Drive, untick the related box of ‘Back up
system files to the recovery drive’ then choose the Next button.
- You should
choose the drive that will be utilized as a recovery drive, and select the
button of Next once again.
- Jump to the
next window, select the button of Create to start the recovery drive
creation.
- If you view the
error, don’t select the Finish button. In its place, hold Alt + B to
go back to the main screen.
- Now restart the
process by marking the box of ‘Back up system files to the recovery drive’
and go via the instructions again.
- Now, you can be
capable of finishing the procedure without facing this error once again.
Run a System File Checker Scan
You should follow these directions as
given below:
- Hold the
Windows and R keys altogether.
- Then input
‘cmd’ into it and select the OK button to invoke the Command Prompt.
- Once prompted
by the UAC, select the Yes button to run it as admin.
- Once you reach
the Elevated Command Prompt, input ‘run /scannow’ into it and hit the
Enter key to start the SFC scan.
- After
initiating the scan, you have to wait to finish the process.
- Don’t switch
off the system during this process.
- Once you finish
the scan process, shut the elevated CMD and restart the system.
Through the above solutions, you can
easily create your recovery drive without any errors. Just make sure that you
have a big enough flash drive to create a recovery. Good luck!
Ellen Cooper is a creative person who has
been writing blogs and articles about cybersecurity. She writes about the
latest updates regarding mcafee.com/activate and
how it can improve the work experience of users. Her articles have been
published in many popular e-magazines, blogs, and websites.
Source : recovery
drive problem
Post Your Ad Here
Comments