Essential Checklist for Hiring Velux Windows Fitters
Velux windows add natural light, improve ventilation, and increase overall energy efficiency. However, fitting these specialist roof windows demands professional skill and knowledge.
Working with certified Velux window fitters ensures safe, accurate, and high-standard installation. Here’s a step-by-step checklist of what homeowners should expect:
1. Finding the Right Installer
Look for Velux-certified installers who are trained specifically in handling Velux products. Request quotes from at least two or three professionals to compare pricing, expertise, and services. Before deciding, review their past projects, verify qualifications, check insurance coverage, and read customer reviews.
2. Initial Consultation and Window Selection
A consultation helps set expectations. The fitter will assess your roof, discuss window placement, style, and glazing options, and provide clarity on timelines, costs, and any preparations needed.
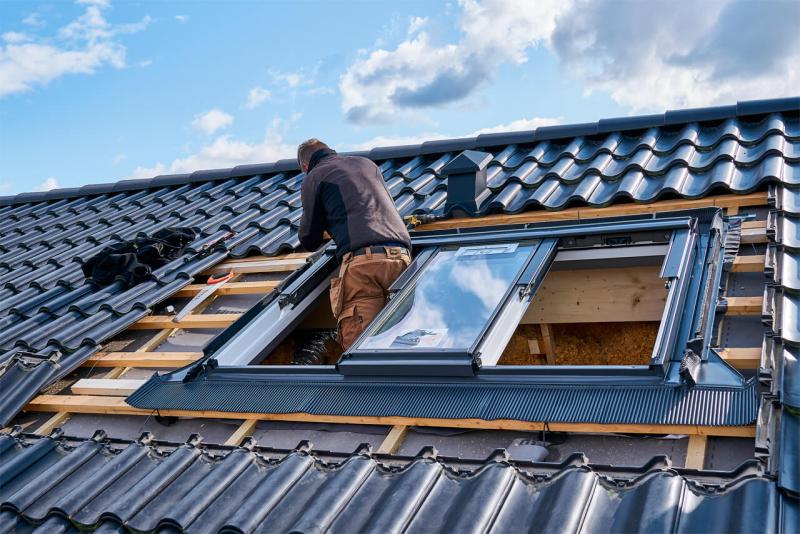
3. Preparing the Space
Before installation, fitters prepare the work area by protecting your home from dust and debris, clearing access to the roof, and moving furniture or window treatments if necessary.
4. Installation Process
- The installation generally includes:
- Marking the window position
- Removing roof tiles/slates
- Cutting the roof opening
- Fitting the insulated frame with flashing
- Installing the window sash
- Sealing interiors against moisture
- Completing plaster and paint work
- Cleaning the site
Professional fitters carefully manage every stage to avoid leaks, drafts, or damage.
5. Timeline and Access
Most projects take one to two days depending on complexity and number of windows. Some jobs may require scaffolding for safe roof access. Confirm these arrangements in advance.
6. Waste Disposal
Many installers include the removal of old windows and packaging, but this should be clarified upfront. Homeowners may also consider recycling or reusing older units.
7. Final Inspection and Testing
After installation, every window should be tested for smooth operation, secure locking, and proper sealing. Both fitter and homeowner should check for gaps, drafts, or cosmetic issues before sign-off.
8. Maintenance Guidance
Fitters provide aftercare advice such as cleaning, checking seals, and scheduling inspections. Regular upkeep prevents problems like moisture ingress and ensures long-term efficiency.
9. Warranty and Documentation
Homeowners should receive all warranty details, installation records, and certifications. Keeping these documents is essential for future servicing or resale value.
Final Thoughts
By following this checklist, homeowners can confidently work with Velux windows fitters to achieve a flawless installation. Properly installed Velux windows not only enhance home comfort and durability but also add long-term value.
Author Information –
This article is written by Yorkshire Roof Windows, specialists in providing certified Velux windows fitters who transform underused or dark spaces into bright, airy, and energy-efficient living areas.
Post Your Ad Here
Comments