Step-by-Step Arduino Coding Tutorials
Arduino is a popular platform for learning and creating electronics projects. Whether you're new to electronics or already have some experience, Arduino provides an easy way to explore coding and hardware. It’s a great way to get hands-on experience, and there are many tutorials and resources available to guide you along the way. In this article, we'll walk you through the basics of Arduino coding, step-by-step, so you can start creating your own projects confidently.
What is Arduino?
Arduino is both a hardware and software platform used for building interactive electronic projects. The Arduino board is a small microcontroller that can be programmed using a special software called the Arduino IDE (Integrated Development Environment). The platform allows you to easily connect and control things like lights, sensors, motors, and other components, making it perfect for beginners who want to learn more about electronics.
Why Learn Arduino Coding?
Easy for Beginners: Arduino coding is simple to learn, even if you're new to programming. It uses a simplified version of the C/C++ programming languages, making it a good starting point for anyone who wants to learn coding.
Hands-On Learning: With Arduino, you don’t just write code – you also interact with the physical world. You’ll see your code come to life by controlling components like LEDs and sensors, which helps you better understand how coding and electronics work together.
Wide Community and Resources: The Arduino community is large and full of helpful people. Whether you're stuck on a problem or looking for advice, there are lots of forums, videos, and tutorials to guide you.
Flexible and Creative: Arduino is versatile and can be used in all kinds of projects, from simple devices to more complex systems. Once you understand the basics, you’ll be able to build nearly anything you imagine.
Getting Started with Arduino
Before you start coding, there are a few things you’ll need to set up:
An Arduino Board: The first thing you’ll need is an Arduino board. There are different types, but the Arduino Uno is the most common and recommended for beginners. It connects to your computer via USB and provides a simple way to power and program your board.
Arduino IDE: The Arduino IDE is a software application that lets you write, compile, and upload code to your Arduino board. You can download it from the official Arduino website and install it on your computer.
Basic Components: To get started with coding, you’ll need some basic components, like LEDs, resistors, and sensors. These will allow you to test your code and learn how to control real-world devices.
Understanding the Arduino IDE
The Arduino IDE is where you write and upload your code to the Arduino board. It’s simple to use, with a few key parts:
The Code Window: This is where you’ll write your Arduino program, called a "sketch." Arduino code uses two main parts: the setup() function (which runs once when the program starts) and the loop() function (which runs repeatedly after the setup is complete).
Upload Button: After writing your code, click the “Upload” button to send it to the Arduino. Once uploaded, the program will start running on the board.
Serial Monitor: The Serial Monitor lets you see data from your Arduino, such as values from sensors or messages from your code. It’s a helpful tool for testing and debugging your code.
Step 1: Setting Up Your Arduino
Here’s how to set up your Arduino board and get ready to start coding:
Connect Your Board: Plug your Arduino into your computer with a USB cable. The board should power up, and you’ll be able to send data to it from your computer.
Install Drivers: Depending on your operating system, you may need to install drivers for your Arduino. The Arduino IDE usually installs them automatically, but if you have trouble, check the Arduino website for help.
Select the Correct Board and Port: In the Arduino IDE, go to the “Tools” menu to choose the right board and communication port. This ensures the IDE can communicate with your Arduino.
Step 2: Writing Your First Program
The Basic Structure
Arduino programs (or "sketches") are simple to write. They consist of two main parts:
setup(): Runs once at the beginning and sets up the Arduino to use sensors or other components.
loop(): Runs continuously and is where your program keeps performing actions, like turning on a light or reading a sensor.
Setup Function
The setup() function is where you prepare your Arduino. You’ll set up your board’s pins for input or output, connect sensors, and configure any other devices you plan to use.
Loop Function
The loop() function runs over and over again, allowing your project to keep working as long as the Arduino is powered. This is where the action happens, like controlling devices based on sensor input.
Step 3: Adding Components to Your Code
Arduino projects often involve using components like LEDs, buttons, or sensors. Here’s how to include them in your code:
Digital and Analog Pins: Arduino has both digital and analog pins. Digital pins can be used to turn things on and off, like controlling an LED. Analog pins are for reading varying signals, such as values from a temperature sensor.
Using Libraries: Arduino offers libraries, or sets of pre-written code, to help you use sensors and other components. Libraries make it easier to interact with hardware, so you don’t have to write everything from scratch.
Controlling Outputs: Outputs are used to control devices, such as turning on an LED or controlling a motor. You can send a HIGH or LOW signal to a pin to turn components on or off.
Reading Inputs: Inputs allow you to read values from sensors or buttons. For example, you can use a button to turn an LED on or off or read a sensor value to adjust your project’s behavior.
Step 4: Debugging and Testing Your Code
Once you’ve written and uploaded your code, it’s time to test it. Here are some tips for debugging:
Use the Serial Monitor: The Serial Monitor is a great tool for checking if your code is working. You can use it to print messages or show the values from your sensors, helping you identify any issues.
Check Connections: If something isn’t working, double-check your wiring. Sometimes, loose connections or faulty components can cause problems.
Simplify Your Code: If your code isn’t working, try simplifying it. Start with just one or two components and build up gradually, testing as you go.
Conclusion
Arduino is a great way to learn coding and electronics. It’s easy to get started, and you’ll be able to see your code come to life by controlling physical components. Whether you want to build simple projects or something more advanced, Arduino offers endless possibilities.
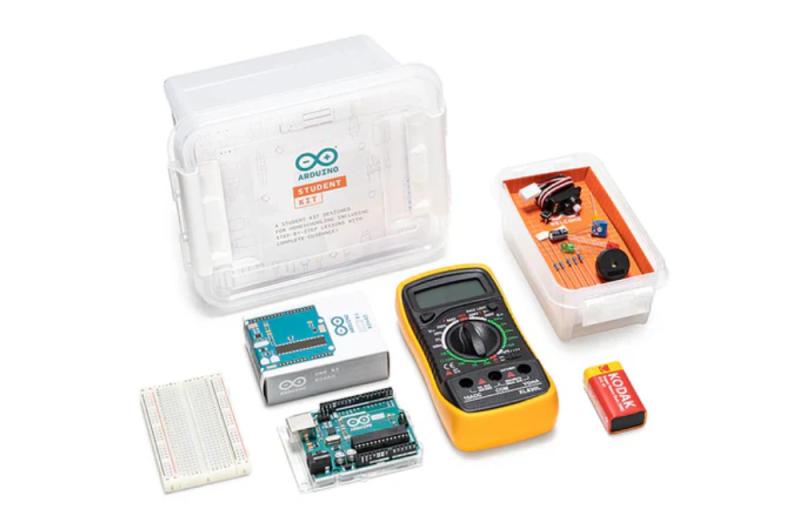
If you're looking for an easy way to begin your journey, you might want to check out the Arduino Coding Kit available at CraftingTable.com. These kits include everything you need to start experimenting with Arduino, including the board, components, and simple tutorials to help you learn step-by-step. Get started today and bring your ideas to life with Arduino!
Post Your Ad Here
Comments