How to Record Screen of Any App in Windows 10
Want to record a video of any app you use in your Windows 10? Screen recording can be useful in many ways; you can show anything that you see on your Windows 10 desktop to anyone when you want. If you’re facing any difficulty in logging in to an app or accessing any feature, you can record screen and show the recording to your friend (or anyone) to tell the issue easily.

Although there isn’t any specific built-in feature to capture apps screen in Windows 10, it has Xbox Game Bar that is used to record gameplay. You have to tweak some settings. After that, you can use it to record the apps screen. Here is how to record the screen of any app in Windows 10.
Enabling Screen recording in Windows 10
A lot of third-party screen recorder software programs are available for free. But, we all want to use the preinstalled feature first, because of many reasons, such as privacy concerns and storage. Don’t worry; you don’t need to download any software, just use these steps.
1. Enter into the Windows 10 ‘Settings.’
2. Go to the ‘Gaming’ section.
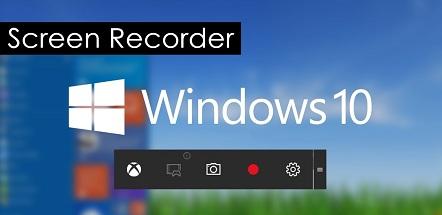
3. From the Gaming option, open ‘Game bar.’ A switch to enable screen-recording will come up in the right pane at the top.
4. Click the toggle switch below ‘Record game clips, screenshots, and broadcast using Game bar’ and turn it on.
After turning it on, you’ll be able to use the Game bar to capture the screen of any app in your Windows 10 computer.
How to record the screen of any app in Windows 10
Although you can capture apps screen with the Game bar, there are several limitations with it. You can’t capture File Explorer and desktop with this tool. Follow these steps to capture the screen of apps.
1. Launch the application whose screen you want to record.
2. After that, bring up the ‘Start’ menu.
3. Search for the ‘Game bar’ with the search.
4. Open the first result. You’ll see the Gabe bar (Microsoft Edge) interface on the screen.
5. Now, use the ‘Record’ button to start the screen recording.
6. Click anywhere on the desktop to hide the Game bar.
7. Record the screen until you want.
8. When you wish to terminate the recording, click ‘Stop’ or minimize the app.
When you terminate the session, your screen recording will automatically be saved in the Videos library under the Captures folder. If you found no sound in the screen recording, then possibly the app is restricted from settings. To allow the app to use microphone, go to ‘Settings’ > open ‘Privacy’ > select ‘Microphone’ and then turn on the toggle switch of the Game bar.
Now, view, edit and share your apps screen recording with your friends (or anyone).
Source :- http://www-activate-mcafee.com/how-to-record-screen-of-any-app-in-windows-10/
Kellie minton is an avid technical blogger, a magazine contributor, a publisher of guides at mcafee.com/activate, and a professional cyber security analyst. Through her writing, she aims to educate people about the dangers and threats lurking in the digital world.

Comments (1)
Sena S.1
Student
I have Windows 10 computer too. However, the default Xbox DVR to record video always regards all as games to capture. I now use Joyoshare Screen Recorder from joyoshare.com to record video audio in high quality without time limit and watermark!