QuickBooks Install Diagnostic Tool usage and Installation Steps
QuickBooks install diagnostic tool is
designed and developed in a way to diagnose and fix the errors occurring while
installing QuickBooks desktop. QuickBooks require many Microsoft components for
proper functioning. In case any of the files are missing or not working
properly, then it might affect the working of the software. The QuickBooks
install diagnostic tool can fix issues related to .NET framework, C++, and
MSXML. It uses core components and when one or more components stops working,
an error appears on the screen.
In today’s post, we are going to discuss the process to fix the errors using QuickBooks install diagnostic tool. Thus, make sure that you read this post till the end, or you can also contact our customer support team for further assistance at 1-888-383-0323.
Steps to use
QuickBooks install diagnostic tool
The user can download the QuickBooks tool hub and use the QuickBooks install diagnostic tool. The steps involved in this process are as follows:
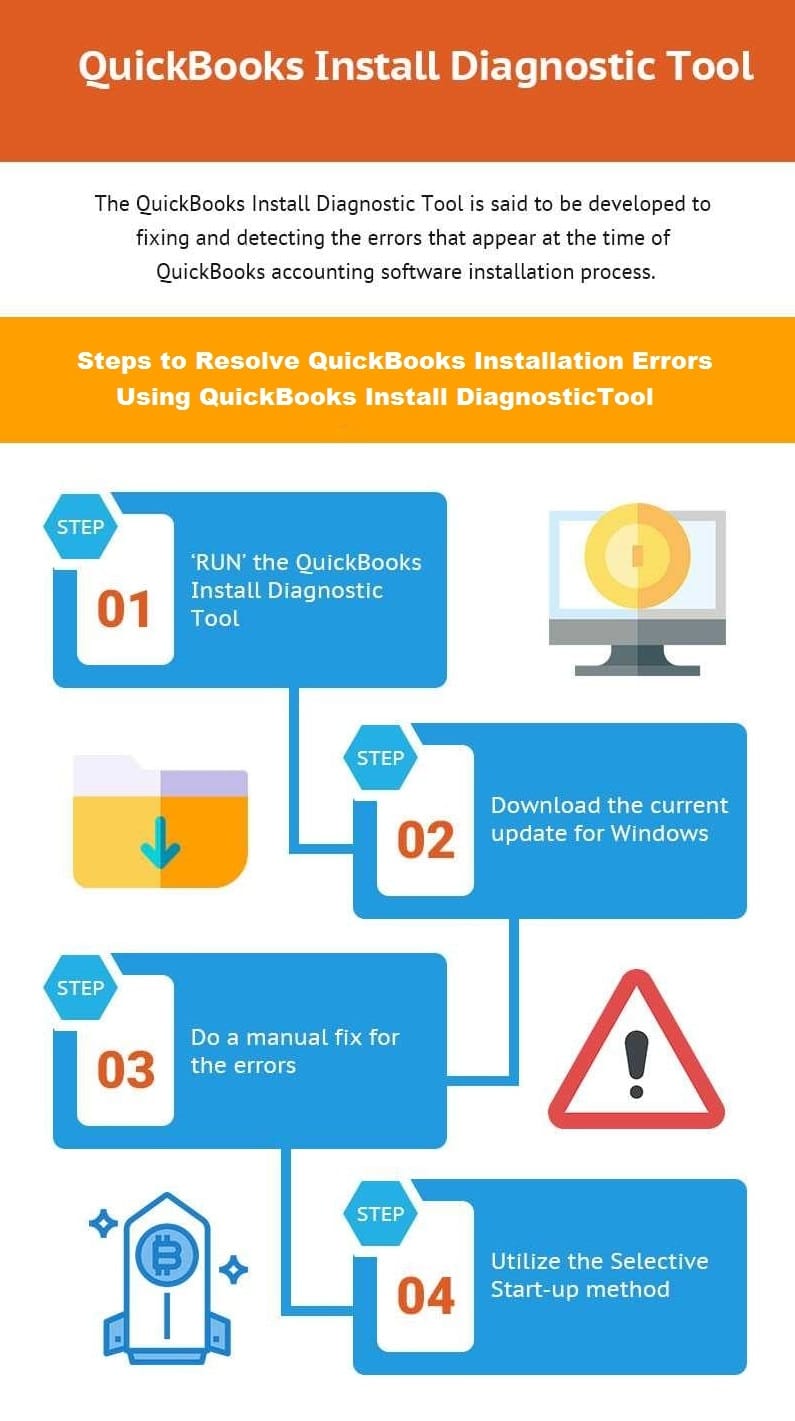
- The first step is to download the QuickBooks tool hub file
- And then save that file where it can be accessed easily
- After that open the QuickBooksToolsHub.exe file you downloaded
- And then follow the onscreen instructions to install it. And then click on agree on all terms and conditions
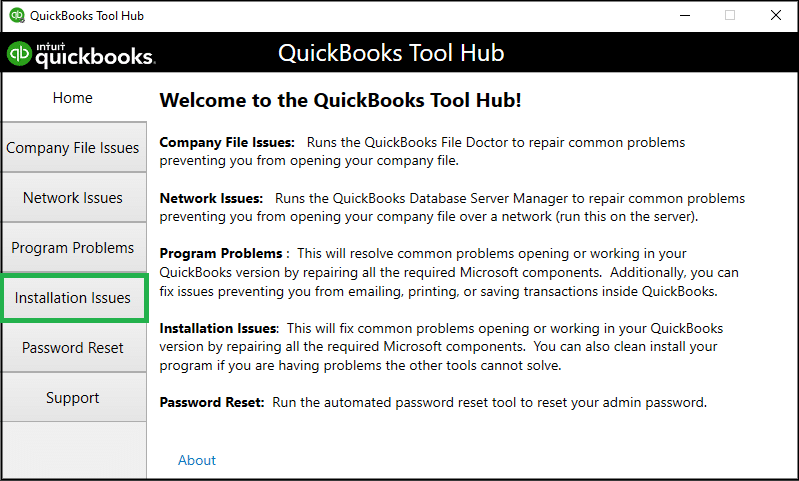
- The next step is to double click the QuickBooks tools hub to open it
![]()
- The user is then required to open the QuickBooks tool hub
- And then select the installation issues in tool hub
- Also, select the QuickBooks desktop install diagnostic tool and let the tool run. It might take around 20 minutes
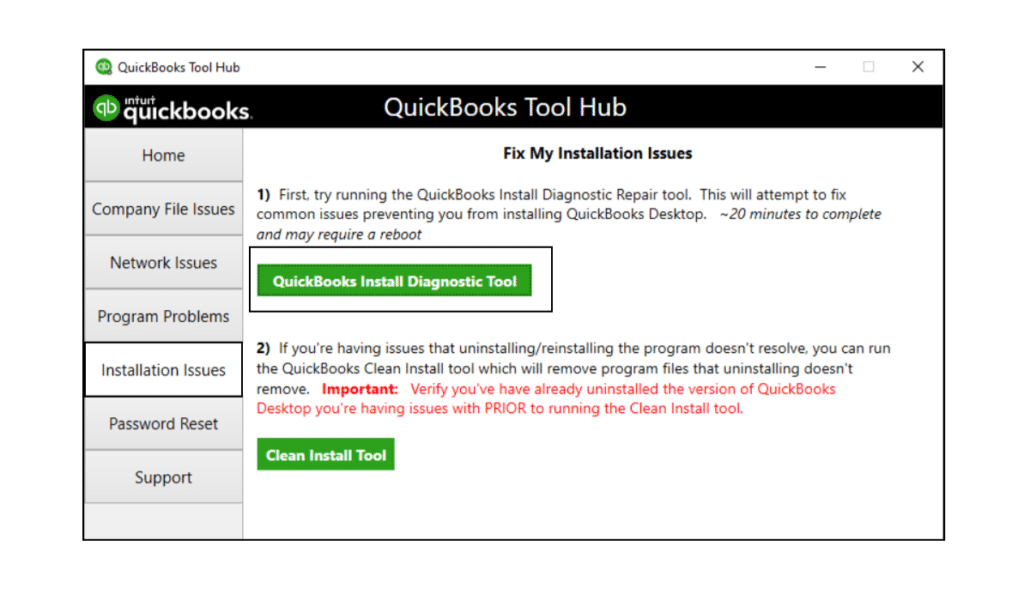
- And when the process is done reboot the system
We end this post over here, with the hope that the above steps will help you in downloading and making best use of the QuickBooks install diagnostic tool.
However, if you are unable to use this tool or for any further assistance contact us right now at 1-888-383-0323. And ask our professionals to fix the error on your behalf.


Post Your Ad Here
Comments