 Articles
How to Troubleshoot QuickBooks Error Code 12002?
by Devil Devis Certified Public AccountantAmong the various errors that have been irritating QuickBooks users lately, Error Code 12002 has been occurring quite frequently. This error is mostly caused due to poor internet connectivity or a network timeout. There is a myriad of several other factors also which might lead to this technical issue in QuickBooks. In this article, we shall make an attempt to resolve QuickBooks Error 12002 from your QuickBooks software. Our efforts endeavor to root out the otherwise arduous technical issues in QuickBooks software.

So, feel free to reach out to our Technical Team for Support. Let us have a rudimentary look at the various causes instigating this error, followed by the various reliable solutions to solve QuickBooks Error Code 12002. Keep reading on!
QuickBooks Error 12002: Major causes
The factors that may lead to this error are adverse. However, given below are the most common reasons behind the QuickBooks error code 12002.
QuickBooks settings might be restricted by the firewall or antivirus.
Incorrect SSL settings may also cause QuickBooks Error 12002.
Server may be down because of a time conflict.
Your internet speed might be too slow.
The default web browser may not be Internet Explorer.
Internet security-related issues may also contribute to this issue in QuickBooks.
Rectifying QuickBooks Error 12002 through updated Solutions
Our experts have drafted this section keeping into consideration that all users may not be equipped with the same set of technical know-how. The solutions have been illustrated thoroughly for your easy understanding. Each of these walkways is equally important and may help you solve QuickBooks Error 12002.
Solution 1: Making I.E., as your Default Browser can fix Error Code 12002
By simultaneously pressing the Windows key along with the R keys on your keyboard, you are required to access the "Run" box.
In the "Run" window, type "INETCPL.CPL" and tap on "OK."
Now, you need to head to the "Programs" section. After this, making Internet Explorer as default browser is the next step.
After making sure that the relevant option for making Internet Explorer the default browser has been chosen, you need to re-launch your QuickBooks software in order to check if the solution proved to be viable.
Solution 2: The I.E., settings should be double-checked
Incorrect settings of the Internet Explorer can also be a potential contributor to the QuickBooks Error 12002. To fix these settings, follow the steps:
Just as you did in the previous method, advance to the "Run" window through the "Windows & R" keys.
Subsequently, type in "INETCPL.CPL" in the "Run" box and then hit the Enter key.
Herein, you need to double-check whether the "security level" has been set to "Medium-high." You can ensure that by opting for the "Internet icon," present the "Security" tab.
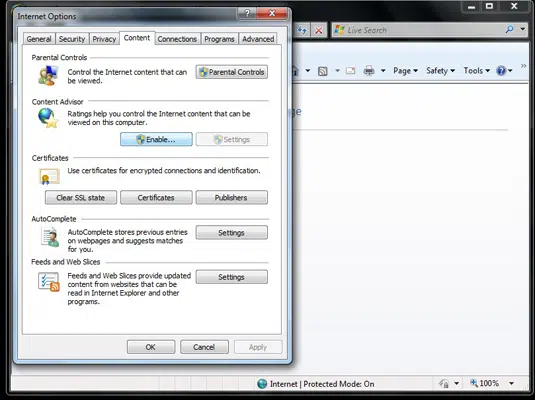
Now, go to "LAN settings" option that is available under the "Connections" tab.
In the Connections box, checkmark "Automatically detect settings." Furthermore, the box beside "use a proxy server from your LAN" should be unmarked and if it is, you need to type in the correct I.P. and Port.
Hit on "OK" after that.
Next, navigate to the "Advanced" page and move to the "security" section.
Within the Security section, double-check that the "Use TLS 1.2" option is chosen. If not, then choose the same, and hit on "OK."
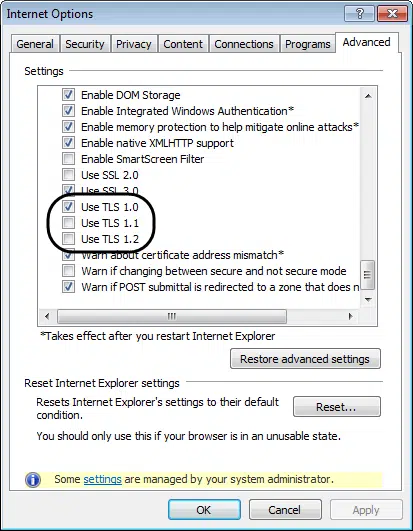
Restart your computer now to see if the issue was fixed. If it’s still existing, then move on to the following resolution strategy.
Solution 3: Updating the QUICKBOOKS Desktop software can also fix the error
Every recent update of QUICKBOOKS Desktop comes with new features. Intuit endeavors to get rid of the glitches and errors that existed in the previous versions. So, you should consider updating QuickBooks Desktop frequently as this will safeguard you against a myriad of error codes, the QuickBooks Error 12002 is no exception. Abide by the procedure below to update QuickBooks.
Close the QUICKBOOKS accounting software initially.
Soon after, double-click the QUICKBOOKS desktop icon, and keep holding the "Ctrl" key on your keyboard. Await the "No Company Open window" to appear.
The QUICKBOOKS Desktop application will start. Once it does, leave the Ctrl key.
Once within the QuickBooks window, move to the "Help" menu, followed by advancing to "Update QuickBooks Desktop."
Now, hit on "Update Now."
Choose "Get Updates" first, and then "Reset Updates."
Finally, pick the "OK" button.
Once the update has been completely finished, choose "Close."
Now, you need to Re-launch the QuickBooks Desktop to install the downloaded updates.
Upon opening the accounting software again, on your screen, you will be prompted to install the updates; choose "Yes."
After that, determine if this solution could solve QuickBooks Error 12002.
Solution 4: (Configure Windows Firewall) Include QUICKBOOKS in exceptions ports
This method requires you to add QuickBooks ports to Windows Firewall. This will make sure that no obstruction is caused to the QuickBooks accounting software due to the firewall. Proceed as follows:
The first step is to click on the "Start" button. Alternatively, hit the Windows key on your keyboard.
Now, advance to the "Windows Firewall" and open the same by double-clicking on its icon.
Within the firewall, go to the 'Advanced Settings' and right-click the 'Inbound Rules’.
Tap on "New Rule," and then opt for the proper Port.
Pick "TCP," and then hit on "Next."
Herein, you need to opt for the Port for your QuickBooks Desktop edition.
For various QuickBooks versions, different types of ports exist. The port number, for instance, for QuickBooks 2019 is 8019, 56728, 55378-55382, and 56276, 55368-55372, respectively.
After choosing and entering the Port, you need to hit on "Allow Connection" and then tap on "Next."
Make sure that each profile is selected in the pop-up window.
Click "Next" after naming the new rule. Pick the "Finish" tab.
Repeat the process for the Outbound rules.
If the solution doesn't help to solve QuickBooks Error 12002, you should jump to the next solution.
Solution 5: (Clean Install) Uninstalling & Re-installing QUICKBOOKS
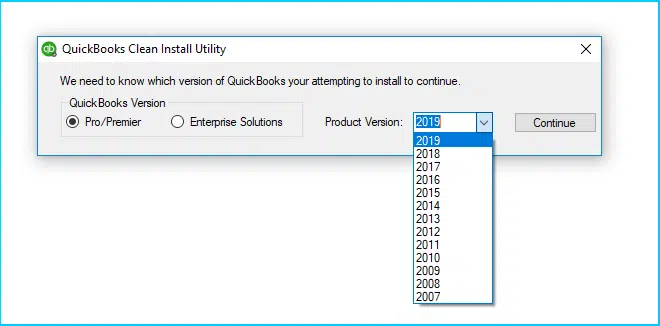
This solution requires you to perform a clean installation of the QuickBooks software.
You can uninstall QuickBooks either manually through the Control Panel or use the QuickBooks Clean Install Tool to ensure a full wipe out of the software. If you opt for the manual procedure, then make sure to delete or rename the QuickBooks folder after uninstalling the program from the Programs and Features tab of the Control Panel.
Afterward, you can re-install the QuickBooks software again. You will need your license and product keys while re-installing the accounting software.
We wind up hoping that these solutions could solve QuickBooks error 12002. If you need any assistance, then our QuickBooks payroll error support team is always there for your help. Reach out to us at 1-800-615-2347 without any hesitation, and we will get your accounting problems resolved.
Sponsor Ads
Created on Sep 20th 2022 06:26. Viewed 175 times.

