How to Setup Email in QuickBooks Desktop - Complete Steps
If you use QuickBooks regularly, you may be aware of how challenging it can be to send invoices and financial reports to colleagues or clients. A common practice is to print out the document, scan it, and send it as an email attachment to the relevant person. However, many people are unaware that QuickBooks has a feature that allows you to set up email within the software, which can significantly reduce the amount of scanning you have to do. In this article, we will explore the process of Steps to Set and Configure Email Service in QuickBooks in detail.
A brief review of QuickBooks Email Setup
The QuickBooks Email Setup is a functionality within QuickBooks Desktop that enables you to send invoices, reports, and transactions to clients or colleagues directly from QuickBooks. This feature can save you time and effort compared to traditional methods. However, before adding an email to QuickBooks, it is essential to be aware of the necessary requirements, including your username, a strong password, incoming email server address, incoming email server type, and outgoing email server type.
Some Important Points to Keep in Mind:
Here are some important points to
keep in mind before setting up email in QuickBooks desktop:
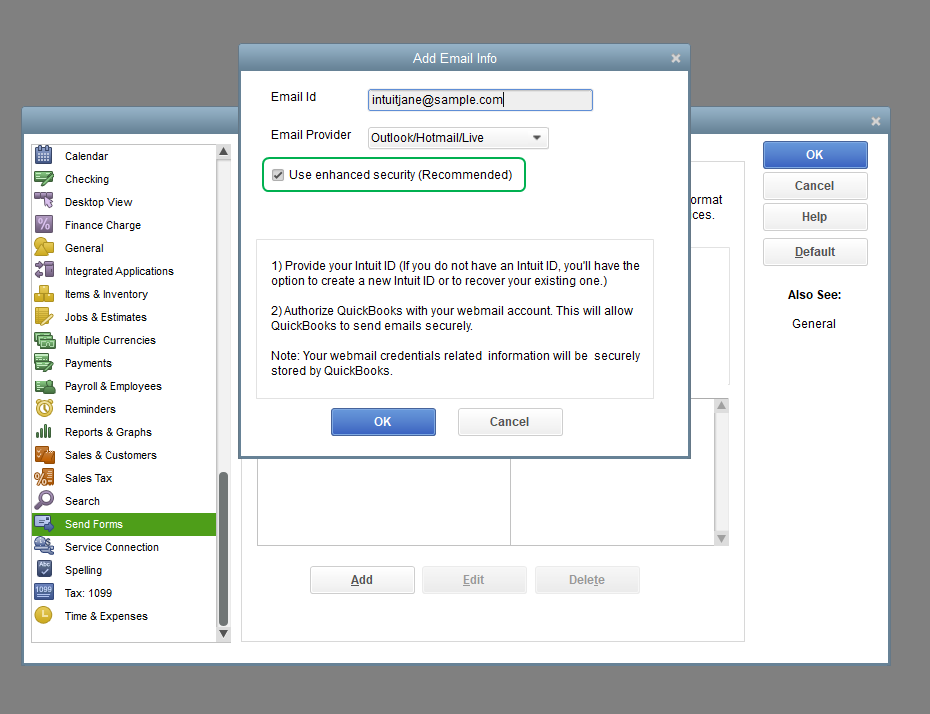
● If you want to use secure webmail for added security, you must have one of the latest versions of QuickBooks Desktop.
●
Another thing
to keep in mind is that you must link your webmail account with your Intuit
account before sending an email using secure webmail.
●
You only need
to link your Intuit account with webmail, and the next time you open your
webmail, QuickBooks won't require you to log in to your email again.
Benefits of QuickBooks Default Email Setup
Here are some advantages of using
QuickBooks Default Email Setup:
●
You don't
need to use your email client every time you want to send an email.
●
You can
directly transfer invoices, payment reminders, and other documents to clients
or colleagues from QuickBooks.
●
Also, the
user can import data from spreadsheets.
●
You can save
time and money by not having to maintain physical records and storage space.
DIY Steps to Set up QuickBooks Desktop Email
●
Open QuickBooks
Desktop and click on Edit.
●
Select
Preferences from the dropdown menu.
●
Look for the
Send Forms option and click on it.
●
Click on Add,
and a new window will appear.
●
Enter the
required information and click on OK.
●
To test it
out, send an invoice or a report via email.
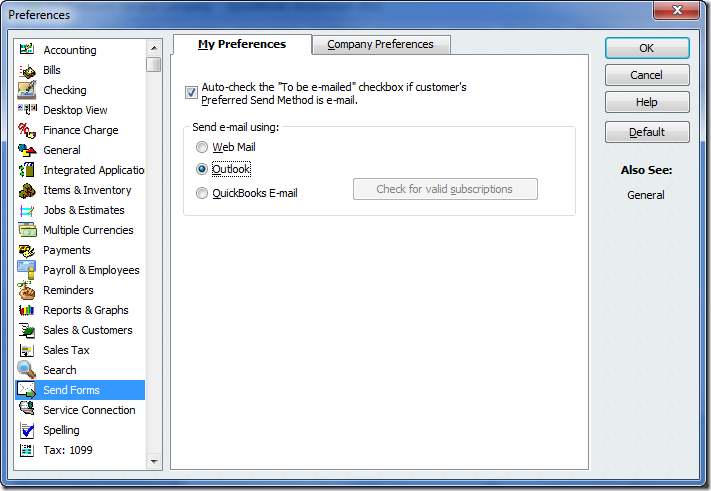
How to Set up QuickBooks Email via Outlook?
●
Open
QuickBooks and select Edit.
●
Click on
Preferences from the dropdown menu.
●
In the new
window, choose Send Forms.
● Under the My Preferences tab, select the Outlook option and click on OK.
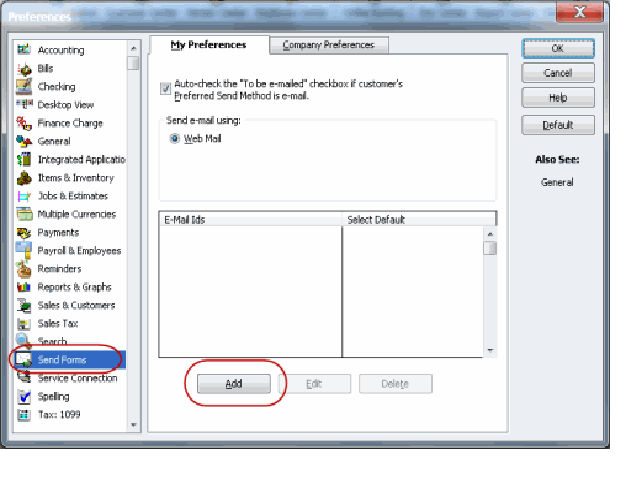
How to Setup QuickBooks Email via Webmail?
●
Open
QuickBooks and select Edit.
●
Click on
Preferences and then choose Send Forms.
●
Select the
WebMail option and click on Add.
●
Enter the
required information in the Add Email window and click OK.
●
Save the
changes by clicking on OK tab.
How to Change the Email In QuickBooks?
If you need to change the email in
QuickBooks, you can do so by updating the email address in the Company
Information window.
●
To start,
open the Company Menu and select My Company.
●
In the Email
section, enter the new email address that you want to use.
●
Click OK to
save the changes.
Conclusion
We hope that after reading this blog, you have found answers to your questions about setting up email in QuickBooks. However, if you still have queries or are facing any issues, don't hesitate to call our toll-free number i.e., 1-800-615-2347 for immediate QuickBooks desktop support.
You might also see: Install multiple QuickBooks Desktop versions on one computer
Post Your Ad Here
Comments