How to Remove & Install Fork Carriage for Still Forklift RX20
The process for removing the fork carriage depends on the lift mast type and lift mast design.
The
fork carriage can be removed from underneath as the fork wear
protection no longer hinders this process; see the chapter entitled
"Fork
wear protection".
Still Steds Navigator Forklifts 8.19 R2 Download & Installation Service
Removing Still Forklift RX20 Fork Carriage
– Park the truck securely.
– Apply the parking brake.
– Move the lift mast to its vertical position.
– Remove the fork arms.
– If necessary, release the pressure from the hydraulics. See the chapter entitled "Releasing the pressure from the hydraulics".
– If necessary, remove the attachment.
– If necessary, unscrew the hydraulic hoses and support from the fork carriage.
– Tilt the lift mast forwards.
–
NiHo and triplex lift masts: Raise the fork carriage until the load
chain anchor is easily accessible. Unscrew the locking device for the
load chain on the fork carriage.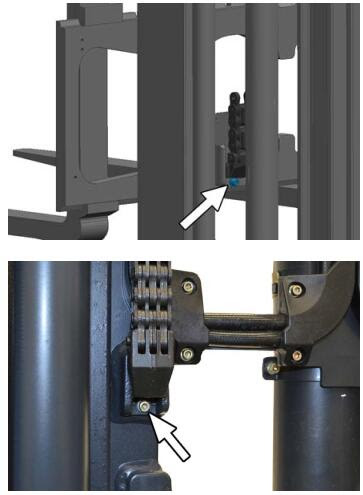
– Telescopic lift mast: Raise the lift mast until the load chain anchors are easily accessible.
Unscrew both locking devices for the load chain.
–Move the lift mast to its vertical position.
– Lower the fork carriage and rest it on a europallet.
– Remove the load chains from the guides.
– Slowly raise the inner mast until the support rollers of the fork carriage are no longer guided into the inner mast.
During start-up, ensure that the load chains and hydraulic hoses are not trapped.
– Position the fork carriage on the europallet.
STILL STEDS Forklift 8.19 8.18 2019 EPC & Diagnostics Free Download
Installing Still Forklift RX20 Fork Car
riage
– Position the europallet holding the fork carriage in front of the lift mast.
– Raise the inner mast until the fork carriage fits underneath the inner mast profile.
– Put the fork carriage in an upright position and position it under the inner mast.
– Slowly lower the inner mast until the upper support rollers of the fork carriage are once again engaged in the guides.
– Slowly lower the inner mast completely. When doing this, note the position of the hydraulic hoses and the middle load chain.
– Insert the load chain into the guide on the fork carriage.
– If necessary, raise the fork carriage using the hydraulic jack until the load chain fits into the guide.
– Raise the fork carriage to a comfortable working height.
– Screw in the load chain locking device on the fork carriage.
– Screw the hose line for the attachments to the support on the fork carriage.
– Adjust the play of the support rollers; see the chapter entitled "Support roller play"
– Fit the fork arms.
– Depending on the equipment installed, fit the attachment and auxiliary hydraulics hoses.
– Perform function checking
Post Your Ad Here
Comments