Guidelines for Installing Pre-Drilled Roof Slates
Slate roof is a beautiful premium roofing material that is also one of the most durable on the market. Unlike asphalt shingles, slate roofing has been used on historic buildings, residential homes, and businesses for centuries because its appearance is timeless, and slate tile retains its value better than most options. It is fire and insect-resistant, environmentally friendly, and sourced naturally.
Slate roofing shingles were one of the first roofing materials used as civilization spread across the globe. Slate is mined from the earth to make these roofing shingles. Slate forms when fine clay is compressed by the weight of the earth, transforming it into shale and then slate.
A piece of slate has layers created by the various compression stages, which enable it to be split or sawed into different thicknesses. It is typically harvested in large slabs, then sawn and quartered along the layers, or cleavage lines, until the desired dimensions are achieved. Countertops, blackboards, electric panels, and flooring are made from larger pieces. The smaller pieces are formed into shingles by hand or machine. Different colored slates are available such as black slate, green slate, etc.. This colour variation is because of the presence of certain minerals in it.
Slate Roofing
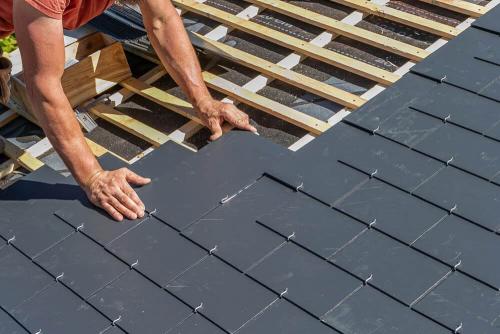
Although hooks are used in the traditional method of slating a roof, this can be time-consuming and complicated. As a result, in this guide, we will show you how to slate a roof using pre-drilled slates.
To begin, determine whether your roofing slates are pre-holed. If they aren't, you'll need to pierce two holes into the slate, one on each side of the short width, about a third of the way up the slate's length. A variety of cutting and holding tools can be used to accomplish this.
Find out your roof's pitch
Before you begin the installation process, you must first determine the pitch of your roof. The amount of overlap required with each slate is determined by the roof pitch.
Determine the required overlap
Once you've determined the pitch of your roof, consult the slate manufacturer's specifications. Each manufacturer will recommend the amount of overlap needed to form a stable and secure slate roof.
The roof membrane should be rolled out
To begin, make sure your rafters or trusses are free of splinters and old nails that could damage the membrane. Then roll your chosen roofing membrane along the roof trusses, beginning at one bottom corner and working your way to the opposite corner.
Repeat this method until you reach the top of the roof. Assemble the roofing membrane so that it hangs over the bottom of the roof and into the gutter, allowing any water that gets past the slates to drain into the gutter.
Keep the roof membrane in place
Once the membrane has been rolled out, secure one edge with clout nails. Then, at the other end, pull the membrane taut and secure it in place, before adding a few more nails across the membrane where it meets the timber trusses for extra stability.
Batten installation
a) The next step is to determine where the battens will go; for this, you'll need two full-sized slates and an under-eaves slate. Place two battens on top of the overlay and leave them loose so they can be moved around for adjustments.
b) Next, place a full-sized slate on a batten, allowing a 50mm overhang into the gutter and aligning the pre-drilled holes with the batten's centre before fastening it temporarily with screws.
c) Place the second batten beneath the slate and slide it upwards towards the first batten. Place the eaves slate on the second batten, making sure it reaches the bottom of the roofline.
d) Nail both battens into the roof rafters with galvanised nails - ensure both battens are parallel by measuring from specific points along the roofline and checking that the distance between them remains constant.
e) Slide the third batten from the top down to just below the top of the slates. Check that the top of the full-sized slate is centred on the batten.
f) Set a second full slate onto the third batten, making sure the pre-drilled holes are aligned with the batten's centre. Check that the batten is parallel, then secure it in place.
Install the roof slates
It's time to lay the roofing slates now that the roof has been properly laid out, with the battens spaced correctly. Begin by laying the under eaves course in a staggered pattern for stability, leaving a 5mm gap between each slate to allow for natural expansion.
Bottomline
Perfectly laid slates will last for many years and are the best option for anyone looking to build a home for the coming generations. Installing a slate roof will require you to dig a little deeper into your wallet, but the payback will be well worth it. You will have a one-of-a-kind, appealing, long-lasting, and secure roof that requires little to no upkeep.
Post Your Ad Here
Comments