end of lease cleaning do it yourself
Introduction
Your lease has been up and now it's time to move out of your rental property. This can be a stressful time, especially if you haven't organized for someone else to clean your home before handing over the keys. Here's a list of things you'll want to do as a part-time or full-time tenant to ensure that your landlord gets their property back in good condition:
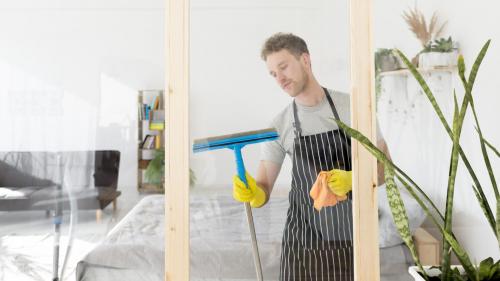
Clean the windows and blinds.
If you have the time and inclination, it is also highly recommended that you clean your windows. Windows are one of the most important parts of any room and often get neglected due to their sheer size.
To clean your windows:
Use a soft cloth to wipe down all surfaces of the window, including frames and sills. If necessary, use glass cleaner on stubborn stains such as bird droppings or smoke residue.
For blinds: remove each slat or panel from its track by grasping both ends firmly and pulling them apart (some blinds may require two people). Wipe down with a damp sponge using soapy water; dry thoroughly with a clean towel before replacing in their tracks. Repeat this process for all blinds in your property.
Vacuum and steam-clean carpets.
If you're using a vacuum cleaner, make sure it has a rotating brush attachment. This will help to get all of the dirt out from underneath the carpet fibers.
If you're using a steam cleaner, make sure that it has a rotating brush attachment. This will help to get all of the dirt out from underneath the carpet fibers.
If you are going to be cleaning your carpets with water, use a soft brush first (it's best if it's made specifically for this purpose) and then follow up with hard bristles for extra scrubbing power!
Mop the floors.
Mop the floors. Mop the floors in the kitchen and bathroom, living room, dining room and hallway, bedrooms and laundry. You can also mop the garage if you like; just be sure to do it on a day when no one will be parking their car there for a while.
Empty, clean and organize cupboards.
Empty, clean and organize cupboards. This is a great time to get rid of all the junk that you've been storing away in your cupboards. You can donate anything that you no longer need and make sure that what remains is organized in such a way that it's easy to access when needed while also looking good.
Wash shelves, drawers and cabinets. Once everything has been removed from these areas, they will need to be cleaned thoroughly before being put back in place. Make sure any food residue has been removed before washing the surfaces with warm soapy water (or use an organic cleaning product if preferred) then give them another rinse with clean water afterwards so they are dry ready for reassembly when you're done sorting through things in other parts of the kitchen as well as around other rooms of the house too!
Scrub the inside of the oven.
To clean the inside of your oven, use oven cleaner. A stiff brush is also helpful for scrubbing away stubborn stains and grease.
Clean the top and sides of the oven door; then use a damp cloth to clean any residue left on the glass of the door itself. If there are any built-up spills or stains on your handle, grab some warm water and soap or dish detergent (you can also use baking soda) to scrub it off with a damp rag or sponge.
If you have an electric range, be sure you remove all removable parts like racks before cleaning them with soap or water; otherwise they may get damaged by steam when you put them back in their place after cleaning them!
Wipe down all lights, fans, walls and skirting boards.
Wipe down all lights, fans, walls and skirting boards.
Wipe down light fixtures, including light switches and bulbs. Wipe the baseboards too. Make sure to clean all of your room's furniture as well, such as desks and chairs.
Wipe down air-conditioning vents.
Next, wipe down the air-conditioner vents. You'll need a cloth or paper towel to do this, as well as some cleaning solution if you have one. If you don't have a cleaning solution, it's okay—just use warm water and a vacuum cleaner to remove dust from the vents first. Then use a cloth to wipe away any remaining dust that may be stuck in between blades of the fan or other places where it can't be vacuumed up easily.
Clean mirrors in bathrooms, ensuites and bedrooms.
To clean mirrors:
Avoid using abrasive cleaning products, as they can scratch the mirror.
Avoid using vinegar, which can damage the glass
Use a squeegee to remove water from mirrors.
Scrub out toilets, baths and showers.
Scrub out toilets, baths and showers. Use a toilet brush to scrub down the bowl. For more thorough cleaning, use a shower head to spray down the entire surface of your shower and tub, then rub it down with a scrubbing pad or sponge. If you have a glass door on your shower (which is often part of an all-inclusive bathroom renewal), check for streaks and spots that need cleaning. Cleaning these will require some elbow grease, but once they're clean you'll be able to enjoy them without worrying about the appearance of grime buildup in the future! Finally, use another sponge or rag to wipe down all surfaces around your bathtub—the walls and floor—to make sure they're clean before moving on to other parts of this step's process: vacuuming!
Remove cobwebs.
Remove cobwebs.
Cobwebs are a common sight in older homes and are caused by dust and debris collecting on the webs of spiders.
To remove cobwebs from your ceiling or walls, use a broom and dustpan to gather any loose strands of webbing into one place. If there are many cobwebs, try using a vacuum cleaner with a brush attachment to clean up the area more efficiently. Alternatively, you can spray down the webs with an all-purpose cleaner and then wipe them away with a wet cloth or feather duster for a quick fix that doesn't require much effort or cleaning products at all!
There's a lot involved with moving out of a rented property so make sure you're organized by getting your end of lease cleaning checklist ready ahead of time.
It's time to clean your rented home. You're moving out and you need to leave the property in good condition, so get ready with our end of lease cleaning checklist!
It's a good idea to work through this list before you begin your end of lease cleaning so that you know what needs doing and how much time it will take.
Make sure all of your belongings are packed up safely in boxes or bags and stored away from sight (you don't want them getting damaged). This will also make it easier for the landlord when they come to inspect the property after your tenancy has ended, as they may charge extra if they find any damage caused by belongings left lying around - even if those belongings belong to someone else!
Conclusion
It's a lot to take in, but the end of lease cleaning process is easier than you think. We've covered what needs to be done and how long each step will take so that you can get started right now! If there's anything we missed, let us know in the comments below.
Post Your Ad Here
Comments