Create new company files from existing ones in QuickBooks Desktop
Do you know the process to create a QuickBooks desktop company file? Well, if not, then reading this post will help you in create a QuickBooks desktop company file. The company file saves all of your financial info and grows with you. In QuickBooks, the user can save multiple company files for multiple businesses. Very easy business should have its own company file.
If you want to create a QuickBooks
desktop company file, then make sure to read this post ahead. Or you can
also call QuickBooks support team and seek for their assistance.
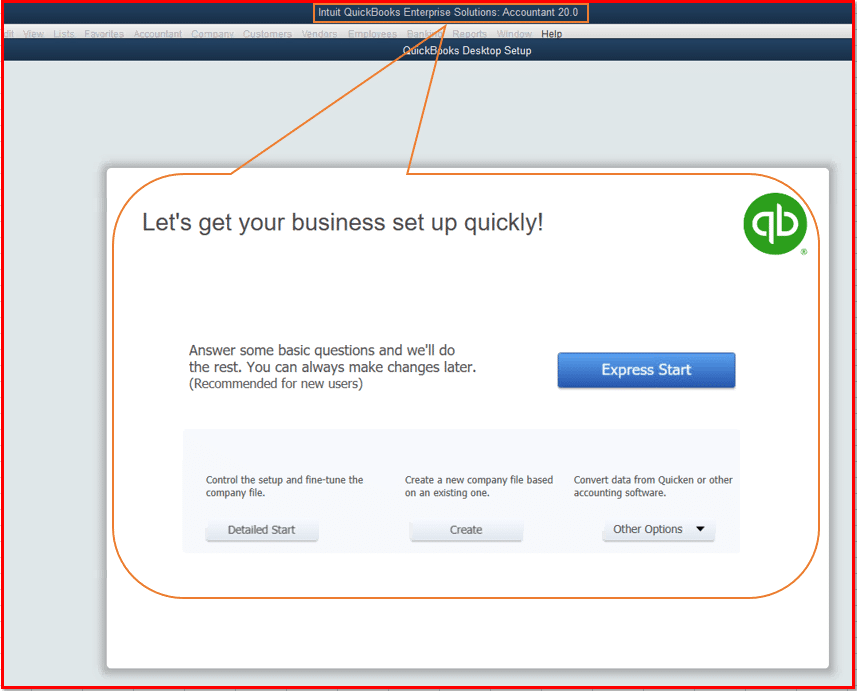
Steps to Create
a new company file in QuickBooks Desktop
The user can use the business information
to create the company file. The step by step process to create a new company
file is as follows:
1.
The very first step is to open
QuickBooks desktop
2.
And then, in the no company
open window, the user needs to select create a new company

3.
Followed by selecting any of
the two setup options:
o
The user can select express
start, in case he/she wants to get started immediately. The user only needs to enter your business
name, industry, and business type to create the company file. The user can
enter this info later on.
o
The user can also opt for
detailed start, in case you want to do a complete setup, so all of your info is
in from the start
4.
Now, the user needs to follow
the onscreen steps to complete the setup. Give your new one a unique name. This
will prevent QuickBooks accidentally overwriting the data.
The user can start working in QuickBooks
desktop, once done with that.
Now that you know the process to create
a QuickBooks desktop company file, you can successfully create it. However,
if you need any assistance, or if you have any query, feel free to get in touch
with QuickBooks desktop support experts and certified QB professionals at 1-800-761-1787. The
very supported team will be happy to help you.
You may also see: How to Troubleshoot QuickBooks Error Code 15215?
Post Your Ad Here
Comments