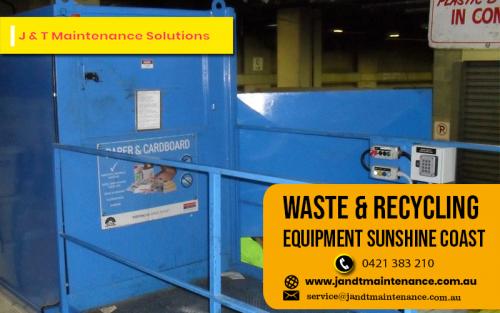
3 Typical Garbage Compactor Issues & Ways to Fix Them

The whole point of this post is to explain the readers about the 3 typical garbage compactor issues which occur regularly and proper ways to troubleshoot them. The tips are shared by notable waste equipment repair and maintenance specialists operating in Sunshine Coast. So, be sure to follow the post carefully!
Believe it or not,
but your garbage compactor stands to be one of the most underappreciated equipment
– be it at home or at your commercial set-up. They help you deal with the large
piles of household waste without making you put in any amount of effort.
But just like any
other existing equipment; your otherwise reliable garbage compactor is not
immune to damage. And, unfortunately whenever the equipment goes on the fritz;
it can make things rather frustrating and inconvenient for you.
That said, you can
always take help from notable waste
equipment repair and maintenance specialists operating in Sunshine Coast to get it taken care of properly. These experts
do this kind of work for a living and using their knowledge, experience and
repair tools; they will be more than happy to oblige to your requests.
While you do have
this option; FYI – there are some easy yet effective ways through which you can
troubleshoot or repair your faulty garbage compactor all by yourself. But, in order for you to do that properly; you
will need to know about the typical garbage compactor problems which take place
from time to time.
Let’s begin, shall
we!
The Garbage Compactor Makes Strange Loud Thumping, Banging,
Squealing Sounds
If you notice your
trash compactor making strange loud sounds such as – thumping, banging,
squealing and whining sounds – the issue could be somewhere in the drive gear!
You should power off
the unit, detach the base cover and locate the drive gear having plastic teeth.
If there are some noticeable wear and breakage on the plastic teeth; that it a
clear sign that you would need to replace it. Also while you’re at it; be sure
to inspect the motor gear, power screw sockets and chain.
Moreover, the
equipment motor gear also consists of plastic teeth which can break. So be sure
to check it out and ensure it has the appropriate amount of tension-which is
only ½ inch of deflection; if you’re replacing it. Also look to lubricate all
existing gears prior to re-assembling your garbage compactor again!
Some repair experts
also state that the banging, crashing ad whining noises might be due to a
faulty top limit switch found inside and atop the unit. In such an instance;
you should shut off the equipment power unit, separate it from equipment
cabinet and carefully unscrew the topmost panel.
You should properly
check if the position of the ram is adequate enough to activate the switch
lever. You can examine the switch for its permanence using a multi-meter and if
found to have no continuity at all simply replace it unhesitantly!
Also don’t forget to
inspect the power nuts for potential damage and then properly lubricate them.
The Garbage Compactor Simply Refuses To Start
At times; you may
notice that the garbage compactor refuses to start. Whenever that’s the case,
the issue at hand could be due to the drive motor, foot pedal, start switch or
its directional switch.
Find out the start
switch which lies at the back of the control panel- especially if your
equipment runs via a control panel power switch or at the drawer if the
equipment powers through a foot pedal.
You need to make sure
that the switches aren’t damaged or corroded. Moreover, if you consist of a
foot pedal operational garbage compactor; ensure it is appropriately lined up
when you press its activation switch.
A faulty drive motor
could also be another cause for your garbage compactor not starting. To inspect
it; you will have to shut off the unit’s main power and detach the drive motor
from the cabinet. Remember to remove the bottom panel and separate the wires.
Also check for continuity in the centrifugal switch using a multi-meter and a
motor winding.
Also, be sure to
check the directional switch by separating the top panel carefully. However, if
you think that managing all this a little too much for you; then unhesitantly
enlist help from waste equipment
preventative maintenance specialists operating in Sunshine Coast.
Your Equipment’s RAM Is Stuck
If the equipment RAM
gets stuck in a down position; then inspect the drive gear. Ensure, the chain
consists of an appropriate half-inch deflection. However, if you don’t come
across any visible issues in the drive gear, then inspect the directional
switch.
To do so; you will
need to separate the top panel along with the RAM mounting bracket to detach
the RAM from the equipment. While you’re at it; you need to check the switch
terminals for its continuity and ensure they aren’t stuck open or closed.
Furthermore, with the
RAM now in an upward position; you need to inspect the existing power nuts for
visible sins of damage. If they do appear to be worn out or broken; then you
might have to replace them and even properly lubricate them prior to
re-assembling your equipment.
Amidst all this; you must remember not to break the directional switch when attempting to manipulate the RAM. You can look to tape it and stop it from breaking so easily.
The author runs a
company specialising in repairs for
waste and recycling equipment in Brisbane. With that, the author also loves
to blog and share with the readers on various tips and tricks to repair and
maintenance of garbage compactors, including stationary and mobile models, High
Rise Garbage Chutes and so on!
Post Your Ad Here


Comments