 Articles
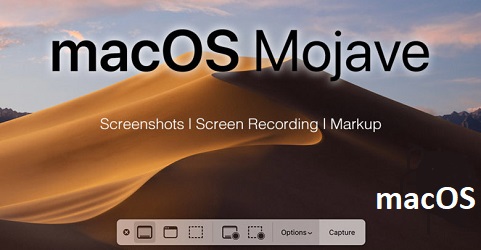
How to Take Screenshots & Record Screen in MacOS Mojave?
by karen minton I am a software engineerIf you would like to know how to take a screenshot on your MacOS Mojave, then don’t worry about that because Apple has rolled out new ways of capturing screenshots that have been added in MacOS Mojave. The procedure for recording the screen is also much more easy.
Taking a Screenshot on MacOS Mojave
If you want to take a screenshot on MacOS Mojave, then you need to follow the instructions given below.
- First of all, hold the Command + Shift + 5 keys on the keyboard to show the screenshot toolbar
- Then you should choose one of the following: “Capture Entire Screen,” “Capture Selected Windows,” or “Captured Selected Portion” to take a screenshot as you want. Go to the Capture Entire Screen will capture a screenshot instantly until you set a timer.
- You have to select the window or choose the screen portion if you select to take something other than the entire screen.
- Later, you should ctrl + click, right-click or two fingers click on the screenshot comes at the end of the right-hand side of the screen.
- Now, with the help of a contextual menu to select where to store the screenshot, share it, bring it up in the Finder, remove it, or mark it up.
Recording the Screen on MacOS Mojave
You need to record the screen on MacOS Mojave, follow the steps mentioned below.
- Get started by holding Cmd + Shift + 5 keys on the keyboard to show the screenshot toolbar.
- Then you should select either Record Entire Screen or Record Selected Portion. The recording will be started instantly if you choose Record Entire Screen.
- You have to choose the part of the screen you would like to record if you are recording a part of it only.
- Thereafter you should select Record on the screenshot & recording control bar.
- Go to the menu bar to stop the recording, click on the Stop button.
- After that, ctrl + click on the recording that comes at the end of the right-hand side of the screen.
- Later, with the help of a contextual menu, select where you want to store the screenshot, share it, etc.
Select a Save Location for Screenshots & Screen Recordings on MacOS Mojave
- To get started, hold the Cmd + Shift + 5 keys on the keyboard to show the screenshot toolbar.
- Then click on Options.
- Choose Documents, Mail, Desktop, Clipboard, Preview, or Messages beneath Save to set a store location.
Set a Timer for Screenshots & Screen Recordings on MacOS Mojave
- Hold the cmd + shift + 5 keys on the keyboard to show the screenshot toolbar.
- Then you should click on Options.
- Now, choose None, 5 Seconds or 10 Seconds beneath Timer to set a timer.
Show the Mouse Pointer in Screenshots in MacOS Mojave
- To begin with, hold the cmd + shift + 5 keys on the keyboard to show the screenshot toolbar.
- You have to click on Options.
- Now, click on Show Mouse Pointer.
Edit a Screenshot in MacOS Mojave
You need to edit a screenshot in MacOS Mojave, follow the steps mentioned below.
- First, you have to ctrl-click, right-click or two fingers click on the screenshot that comes at the end of the right-hand side of the screen after you capture a screenshot or screen recording.
- Then click on Markup.
- With the help of toolbar to write or draw, add shapes, highlight, insert text or a signature, rotate or choose text style on the toolbar at the upper side of the Quick Look screen.
- Now, select Done when you finish the process.
Edit a Screen Recording in MacOS Mojave
If you want to edit screen recording in MacOS Mojave, then you need to follow the instructions given below.
- First & foremost, ctrl-click, right-click or two fingers click on the recording that comes at the end of the right-hand side of the screen after capturing a screenshot or screen recording.
- Then click on Markup.
- You have to select the trim button near the upper right-hand side of the Quick Look screen.
- Later, go to the hold points at either end of the recording’s timeline, & set their position to modify the length of the recording.
- Now, click on Done.
Source :- http://www-mcafeeactivate.support/blog/how-to-take-screenshots-record-screen-in-macos-mojave/
Kellie minton is an avid technical blogger, a magazine contributor, a publisher of guides at mcafee.com/activate and a professional cyber security analyst. Through her writing, she aims to educate people about the dangers and threats lurking in the digital world.
Sponsor Ads
Created on Oct 22nd 2019 02:54. Viewed 346 times.

