How to record your Mac’s screen without using QuickTime
With macOS Mojave, users also get a new feature for capturing and recording the screen of their Mac. This new tool simplified the process of recording the video of your screen. So, without using the QuickTime player, you can record video of your Mac’s screen as well as take screenshot easily. Here is how to use the new screenshot toolbar to record screen.
How to record video of your Mac’s screen
Screen recording is much easier with the new screenshot toolbar of macOS Mojave. You can record the whole screen as well as a selected portion, just launch the toolbar and start recording; here’s how.
1. Press the Key “Command + Shift + 5” together to open screenshot toolbar.
2. Click on an option as you want to record the screen, whole screen or a portion.
3. The recording will immediately start if you choose “Record Complete Screen’.
4. Select the part of the screen you want to record if you’ve chosen “Record a Selected Portion.’
5. Then click the ‘Record’ button on the toolbar and control bar.
6. Click the ‘Stop’ button on the menu bar to stop recording.
For more option like save, delete, share, and more:
• Right-click or control-click on recording window at the lower right side of the screen.
• Click on an option on the contextual menu.
How to choose a location to save your recording
There are limited locations you can select to save your screen recording after you record them. Although, you can also select a place before you start recording. Here is how to choose a destination to keep your recording.
1. Press the Key “Command + Shift + 5” together to open screenshot toolbar.
2. Click on ‘Options’ button.
3. Choose an option from the prompted menu to set a location to keep your file.
How to set the timer for your screen recording
1. Press the Key “Command + Shift + 5” together to open screenshot toolbar.
2. Click on ‘Options’ button.
3. Choose “5 seconds, 10 seconds, or None” from the Timer section on the prompted menu.
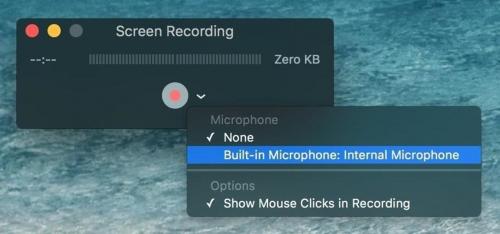
How to record screen with mouse pointer
1. Press the Key “Command + Shift + 5” together to open screenshot toolbar.
2. Click on ‘Options’ button.
3. Click on ‘Show Mouse Pointer’ on the prompted menu.
How to edit or trim a screen recording
1. Right-click or control-click on recording window at the lower right side of the screen.
2. Click on “Markup” on the contextual menu.
3. On the Quick Look window, click ‘Trim’ icon at the upper-right corner.
4. Click and hold the point from the end of the bar, if you want to trim your recording.
5. Click the ‘Done’ button on the top to save.
Carl Smith is a self-professed security expert; he has been making the people aware of the security threats. His passion is to write about Cyber security, cryptography, malware, social engineering, internet and new media. He writes for Norton security products at norton.com/setup.
Source - https://www.quicksetupnow.com/how-to-record-your-macs-screen-without-using-quicktime/

Comments (1)
Sena S.1
Student
That's useful for whoever want to record screen on Mac. However, according to my experience, QuickTime cannot only record the system audio by default. I find no way to close the microphone sound to avoid possible noise. Anyway, it's better to select a tool flexibly recording video with audio or without audio. If you ask me, which one? I'll say Joyoshare Screen Recorder, OBS, etc.
More: joyoshare.com/screen-recorder-for-mac/